If you’re looking for more TouchDesigner tips and tricks along the lines of our recent post TouchDesigner Beginner Tricks & Custom Parameters You Should Know or our TouchDesigner starter course, don’t touch that dial! As you get more comfortable with the program, you may find yourself looking for ways to create more advanced functionality or shortcuts to achieving common goals. In this post, we’ll take a look at several tricks and operators that you should know in TouchDesigner that fall on the advanced beginner to intermediate side of things.
The Shuffle CHOP: Reorganize Your CHOP Channels and Samples
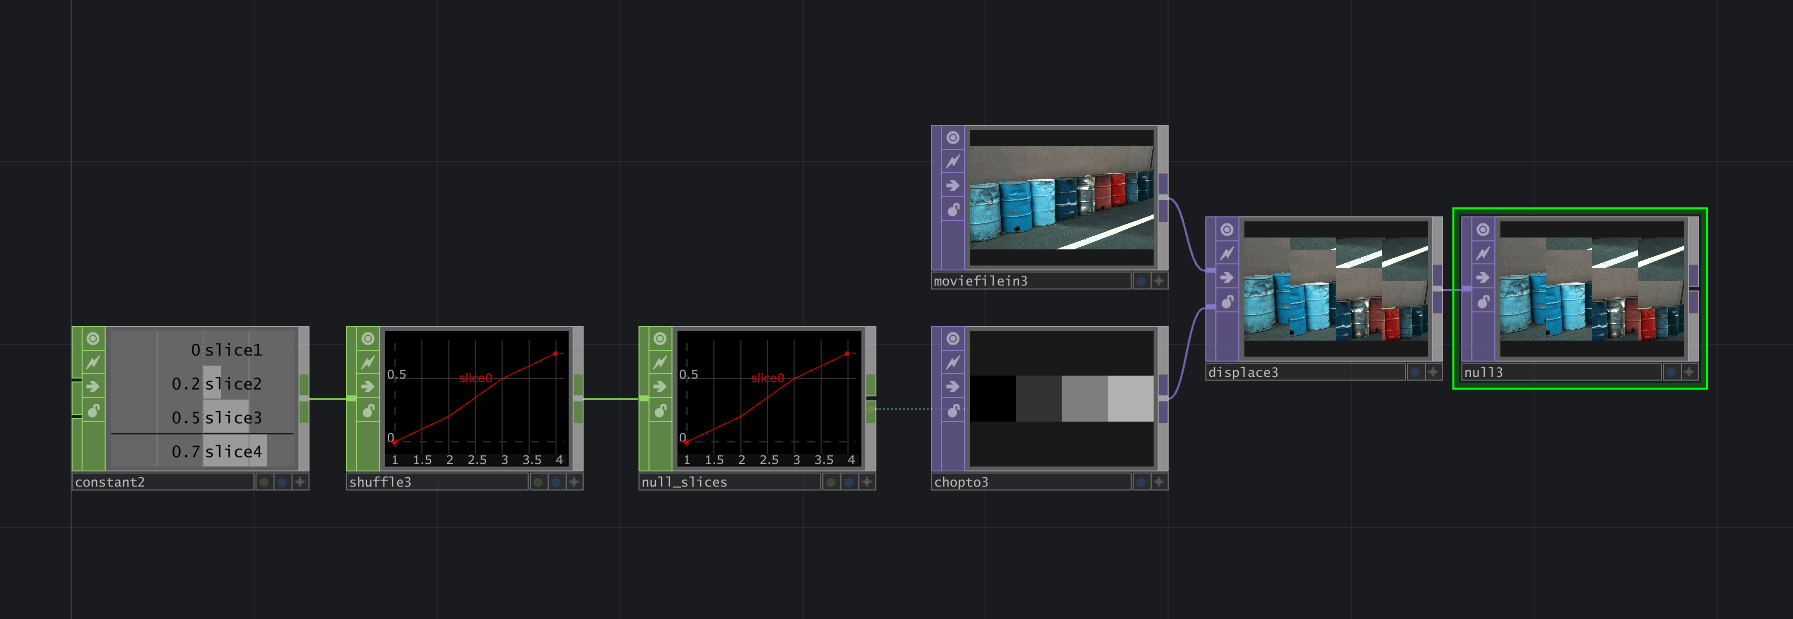
The Shuffle CHOP is a useful CHOP that can reorganize the samples in a set of channels. One of the most common uses of the Shuffle CHOP is to swap the incoming CHOP channels and samples — meaning that if you have four incoming channels as in the example below, you’ll end up with a single channel with four samples.
In the example below, we use this functionality to create a simple displacement effect. The shuffled CHOP channel is converted to a TOP texture via a CHOP To TOP, which is used as the displace image input to the Displace TOP. By starting the CHOP network off with a constant CHOP, we have the ability to control the vertical displacement of each of the four “slices” of the image.
In this second example, instead of using a Constant CHOP with static/user controllable values, we’ve plugged in a Beat CHOP which is outputting tempo-synced sine waves. In this case, the texture is used both for a Displace TOP and a Remap TOP, to showcase another application of the effect.


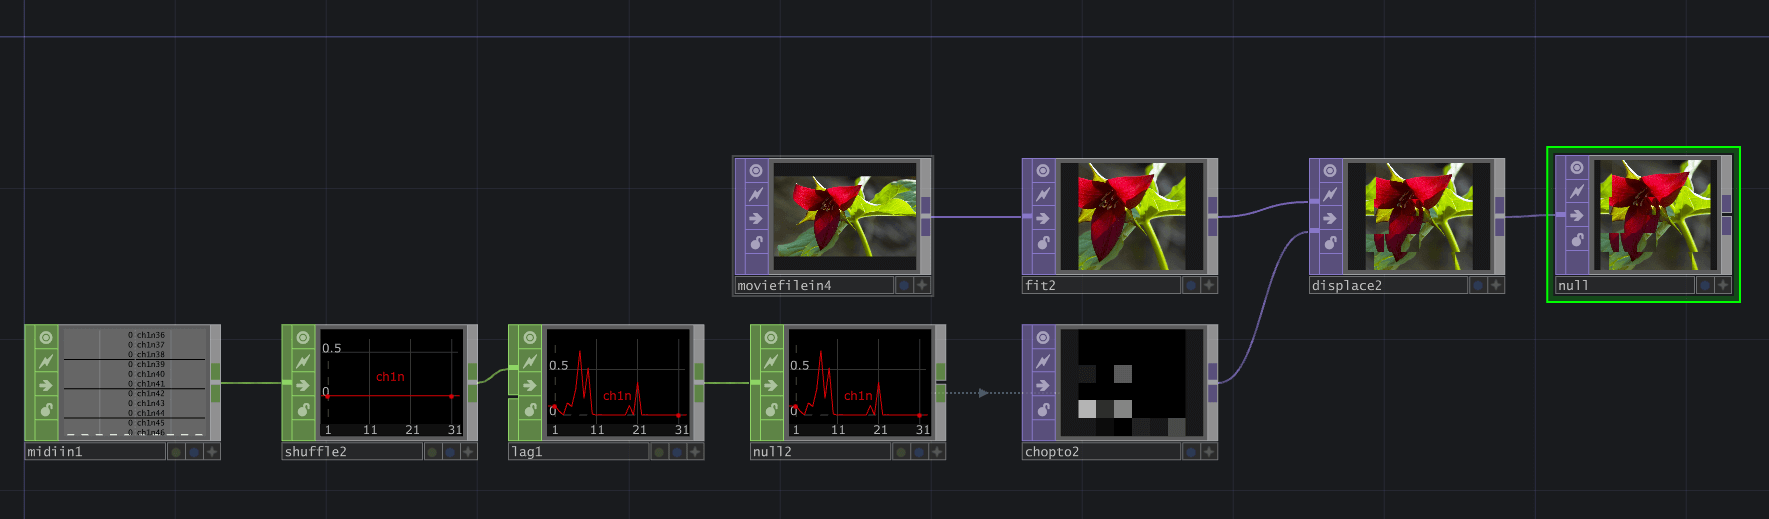
Another situation that you might find shuffling channels and samples useful is with incoming MIDI data. In this example, we’re taking the separate channels for each MIDI note and shuffling them into a single channel, which again is used for a displacement effect. As we’re using the MIDI data directly for the displace image via the CHOP to TOP, the displacement is directly controllable by the particular MIDI note and velocity (the note impacts the square that’s displaced, and the velocity controls the amount of displacement) all thanks to the Shuffle CHOP. Pretty cool, huh?

Although these examples are focused around using the data for simple displacement effects, hopefully they illustrate how the Shuffle CHOP can be useful for transforming CHOP data with many channels into a more usable single channel form for certain situations. For more examples, check out the OP Snippets for the Shuffle CHOP.
Event CHOP: Create Overlapping Events
Commonly used with MIDI data, the Event CHOP is a really interesting tool for creating overlapping events based on triggers. On the TouchDesigner wiki, it is described as “a simple particle system designed for MIDI keyboards“. Like a particle system, you have a number of controls for the lifetime of each event that you generate. A full ADSR envelope is generated for each event, with controls for each stage along with local and global speed controls.
Although you’ll commonly see it used with a MIDI In CHOP, the Event CHOP also provides the option for generating events via a Python function, which gives you much more granular control. With Python, you can adjust all parts of the ADSR envelope (time as well as level), speed, index values, holding the sustain state and more, for each event independently. Don’t look too excited — I know, it’s pretty amazing.
What this means is that you can selectively apply different envelope values, speeds, etc. based on the particular MIDI note (or other trigger) that you receive for all kinds of interesting effects. In the following example, we’ve used this functionality to hold all notes when a certain MIDI note number is received, and not to release the hold until the same MIDI note is received again. It’s pretty simple functionality, but looks really cool when used as instancing data, appearing almost like a scrolling score of notes.


As with all things in TouchDesigner, we’re of course not limited to MIDI data for triggering events. It can be triggered with any sort of off-to-on signal you can create, or of course by the Python function call. It can be a great tool for situations when overlapping events are required (instead of being limited to a single, retriggerable event in the Trigger CHOP). Check out the OP Snippets for the Event CHOP for further examples!
The Timer CHOP and a Table DAT: Many Timers In One
Even if you’re a TouchDesigner beginner, you’ve probably worked with the Timer CHOP. (If not, it’s well worth a look!) What you may not have realized about the Timer CHOP is that besides the usual Length, Delay, and Cycling settings, and even the incredibly useful Python callbacks, there is still some additional functionality available under the hood. What if I told you you could run multiple timers with different settings (length, delay, cycles, and more) from a single Timer CHOP? *Gasp!* Or that you can chain timers with different settings together (instead of having to trigger separate timers in sequence, or programmatically change the settings)?
How, you might ask? Simple — the Segments DAT parameter. Grab yourself a Table DAT, and you too can access these amazing features.
For each row of the table, you can define one timer segment. The column headings can be delay or begin, length, cycle, cyclelimit, maxcycles and cycleendalert, which override the equivalent parameters. Most of these will look familiar, as they have an associated parameter. However, begin is different. It replaces delay, and it represents the time from hitting Start that the timer will begin counting.
The way that the segments defined in the table are interpreted depends on the Segment Method parameter, which can be set to Serial Timers or Parallel Timers.
The Serial Timers mode is illustrated in the example below. In it, the timer segments are run sequentially, so after the timer completes with the settings from the first row, it will continue using the settings from the second row, and so on.
To help break this down, let’s take a look at what the information in the table below means. The first segment is three seconds long, will start after a delay of one second, and will run one time. The second segment is one second long, will start immediately (no delay) and will cycle twice after the first run. The third segment is two seconds long, will start after a delay of two seconds, and runs only once.
In the next example, we’re using the Parallel Timers mode with the exact same timer segments from before. In this case, all of the timers run at the same time, with separate channels created for each timer. All of the same information we covered above about the segments of the timer is still true, with the only difference being that they start running together instead of one after the next.

The parallel mode can be very useful when you have multiple animations that need different lengths of time to complete, or need a different amount of delay time before starting. Rather than using multiple timers, you can just use one! As usual, the OP Snippets for the Timer CHOP provide some great additional examples of the functionality in use.
Get Our 7 Core TouchDesigner Templates, FREE
We’re making our 7 core project file templates available – for free.
These templates shed light into the most useful and sometimes obtuse features of TouchDesigner.
They’re designed to be immediately applicable for the complete TouchDesigner beginner, while also providing inspiration for the advanced user.
Adjusting Point Cloud Perspective via Camera Blend COMP
One final trick we’ll take a look at is using the Camera Blend COMP in combination with a simple CHOP channel input to allow easy shifting between views of a point cloud.
The Camera Blend COMP, if you’re not familiar with it already, allows for easy transitioning between multiple different camera angles, all in a single component. With this COMP, you can transition between two or more camera angles without needing to add additional Render and Composite TOPs to the network. You can simply reference the COMP within the Camera parameter of the Render TOP, and it takes care of the rest.

In this example, we’re rendering a simple point cloud of a sphere and have added two cameras to the scene. Each camera is positioned so that it views the point cloud from a different angle. These cameras are parented to a Camera Blend COMP for easy transitioning between views.
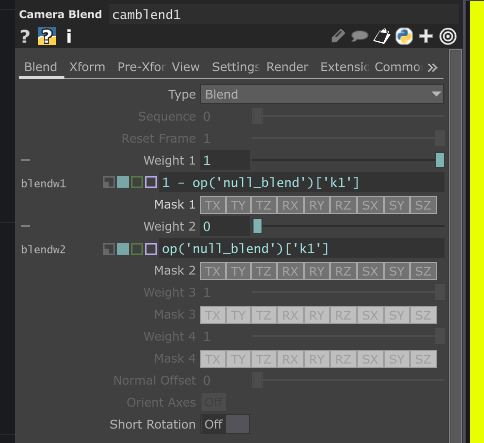
Within the Camera Blend COMP, the weight parameters are used to weight each corresponding input parent. In this example, we’ve set up a simple CHOP network that uses the 1 key to toggle a CHOP signal on/off, which is then filtered to create a switchable fade between 1 and 0. We’ve connected it to the weight parameters so that it allows for an easy transition between perspective views of the point cloud.

This is a very simple example, but imagine if you were to connect this to a simple sensor. A switch, IR sensor, proximity sensor, etc. could replace the keyboard control here and provide a simple way of manipulating the view of the point cloud. But unlike working with the camera alone, the two views are preset/fixed, and don’t require any animation of the transform or rotate parameters to animate between. And not only that, you’re not limited to just two cameras, either!
For more even more optimization tricks in TouchDesigner, check out this tutorial by Elburz:
Wrap-Up
That’s a wrap! I’d highly recommend checking out the OP Snippets for the operators we covered in this post, as there are many, many more advanced possibilities for working with each. You’ll also might find some related operators or techniques that work well in tandem with what we’ve looked at. These are just a small sample of the many tricks and tips that could be covered, but hopefully you’ll find them helpful as you continue learning the ins and outs of TouchDesigner. Happy programming!
