This week we had a topic request come in asking us how we would approach initializing a project that has a lot of CHOP networks linked to animations. This includes networks of Button COMPs, Animation COMPs, Timer CHOPs, Trigger CHOPs, and more. I’m sure many folks, ourselves included, have been stuck in this tricky question before, having to resort to tactics like bypassing and un-bypassing CHOPs quickly to reset them. This seem non-intuitive methods of working that can be prone to bugs and thankfully there are some strategies you can use to create bulletproof animation systems in TouchDesigner.
The main problem with animation in TouchDesigner…
The main problem that a lot of folks experience when thinking about animation systems of any kind in TouchDesigner is that they’re thinking about them as single units or single CHOPs or single objects that are somehow running and giving you a great output with all the controls you might need. TouchDesigner, being the flexible and rich development environment that it is, actually doesn’t have a single node that can handle that properly (in my honest opinion!). And that right there is the problem: approach. Animation systems become incredibly easy to build, use, and master once you start thinking about them as networks instead of single operators. I’m looking at you Animation COMP and Trigger CHOP…y’all making it seem easy…until it isn’t…

Whether it’s controlling curves just the way we want them, being able to make the length an easy to adjust variable, initialization, resetting, reversing, or anything else, trying to approach any single operator as the solution will make your life too hard.
The one CHOP to rule them all…
You may be surprised to hear, but Timer CHOP is actually the best way to drive almost any animation system. Doesn’t matter how complex the curves are, how many channels, or any of that. It’s hands down the basis of any animation I’ll ever do in TouchDesigner because:
- It has easy to use options for setting the length of your animation in seconds or frames in it’s Length parameter
- It has an incredibly easy to click Initialize button that fully resets it so it’s ready to run again on command
- It has an incredible easy to click Start button to get it rolling
- It can run once, loop a specified amount of times, or loop indefinitely with a few clicks
- It has a rich set of Python callbacks for triggering other elements in your project based on the state of the timer
- It has a ton of different status channels you can enable to get granular CHOP data about what the timer is doing

Timer CHOP is a blessing. When it came out, all the pro’s were about as excited as we were when PBR MATs or Bullet physics were introduced. But how do we build an animation system out of a Timer CHOP?
The power of lookups
If Timer CHOP is the one CHOP to rule them all, then Lookup CHOP is the right-hand of the operation. Timer CHOP without Lookup CHOP would not be very helpful. If you haven’t used Lookup CHOP before, there are some videos on our YouTube channel where I quickly show it off:
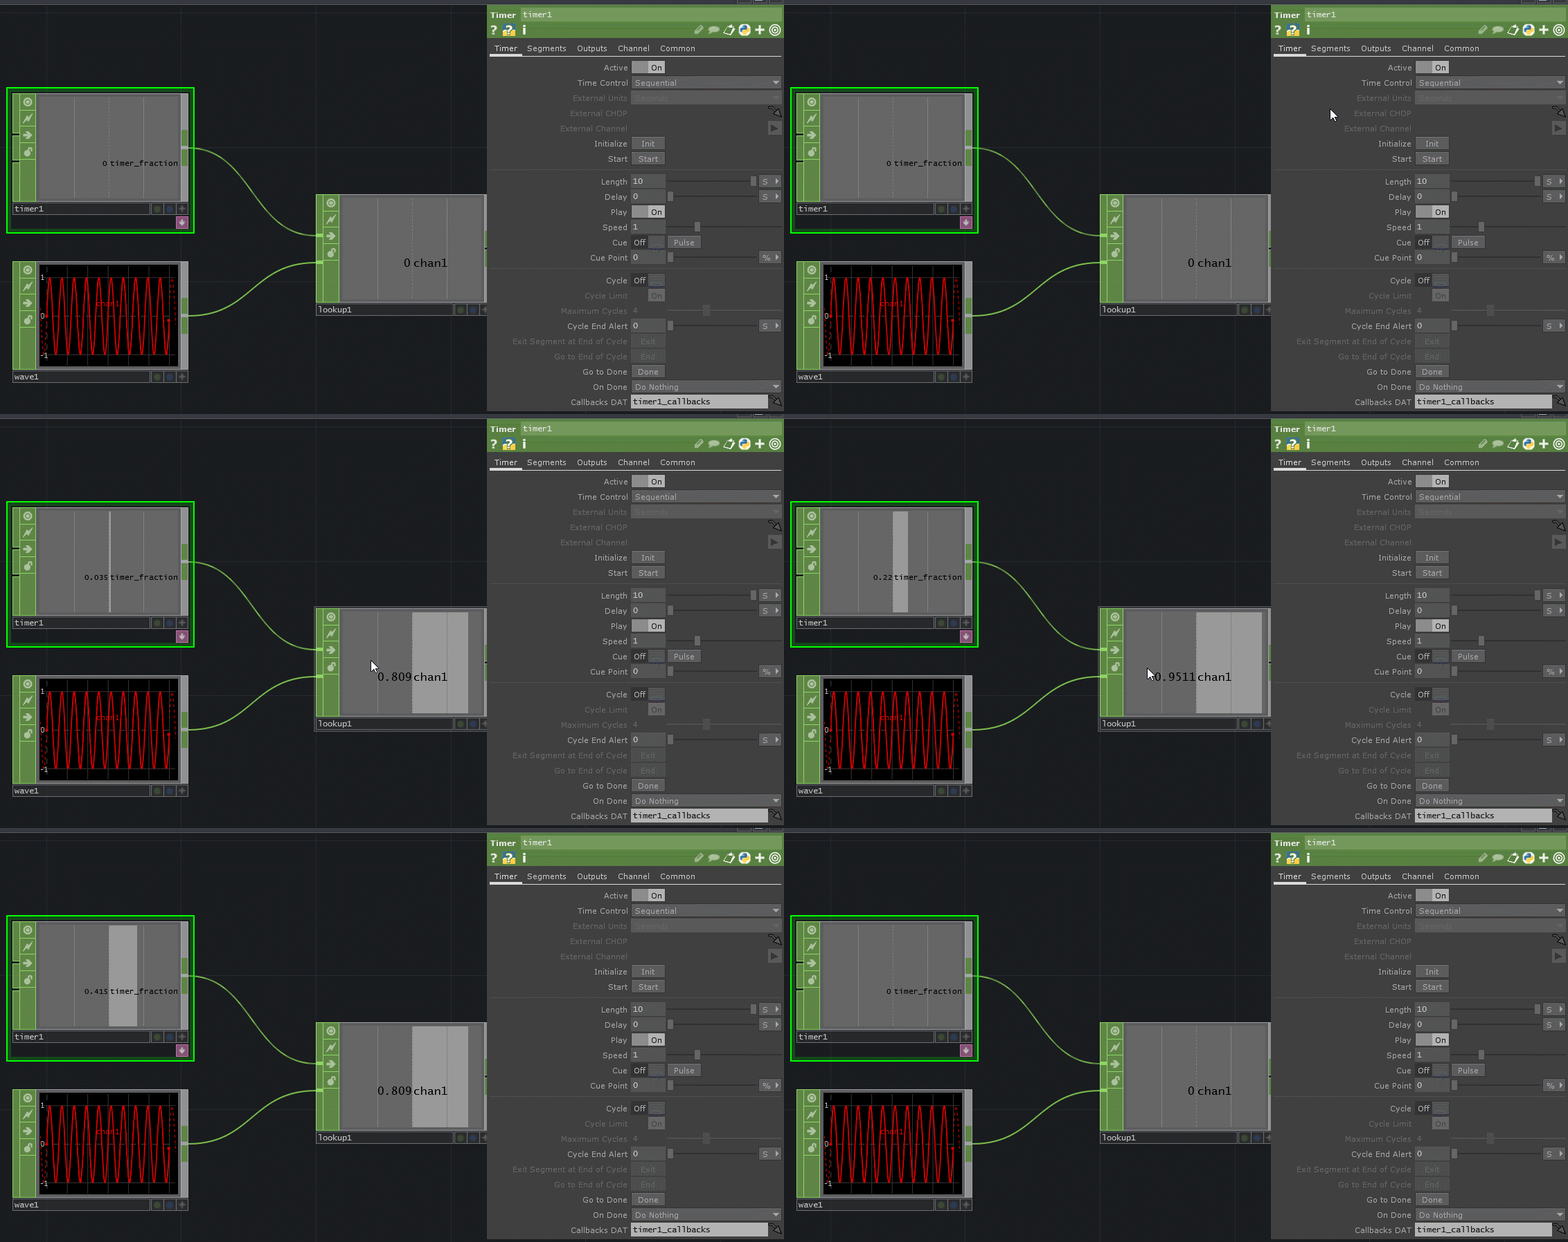
What Lookup CHOP does is scan across a second input CHOP with lots of samples using the index provided by the first input CHOP value. A good way to see this is if you plug in a Slider COMP to the first input of a Lookup CHOP, and plug in something like Wave CHOP. You’ll see that the slider acts like a playhead that you can use to scan through the 2nd CHOP and pull out the value at that position:

I hope you’re able to see what’s about to happen! Because instead of using a Slider, we could use a Timer CHOP as our “playhead” feeding into the first input, and any kind of animation curves we want feeding in as our second input! It’s really that simple:

This means we can take advantage of all the controls the Timer CHOP has to make the perfect playhead with built in start, stop, reset, length, and looping controls and combine it with whatever type of animation curve we want. The great thing about Lookup CHOP is that it interpolates automatically for you. We could easily change the length of our Timer CHOP to be 1 second or 30 seconds without having to worry about the length of our second input:

The values on the top Lookup CHOP look choppy because of the 5fps gif recording, but I can assure you it interpolates really well. The final thing we’ll need in this animation system are some crafty ways of making the curves!
Get Our 7 Core TouchDesigner Templates, FREE
We’re making our 7 core project file templates available – for free.
These templates shed light into the most useful and sometimes obtuse features of TouchDesigner.
They’re designed to be immediately applicable for the complete TouchDesigner beginner, while also providing inspiration for the advanced user.
Tricks for generating curves
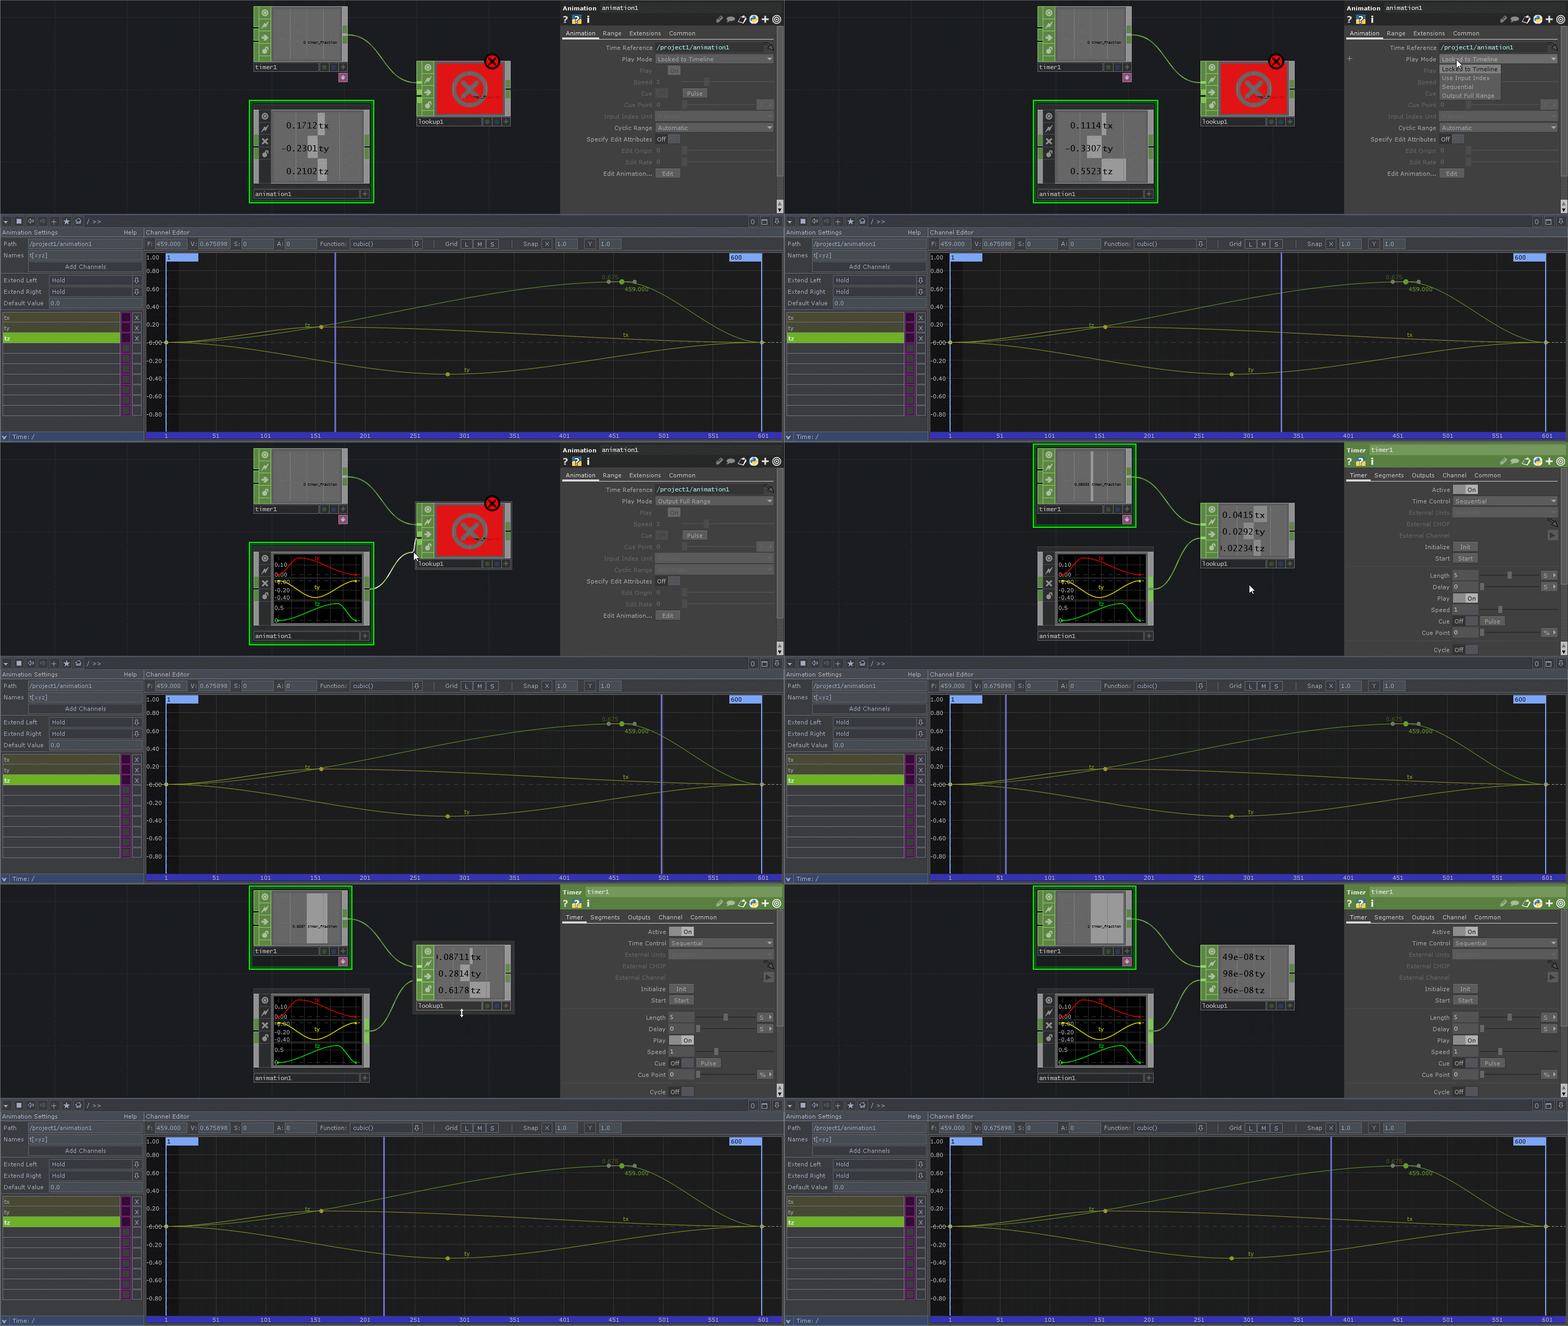
So we’ve got the brains of the operation between a Timer CHOP and Lookup CHOP, but what about those curves? We’re in luck here. We can still use Trigger CHOP and Animation COMP to quickly generate these. For example with the Trigger CHOP, you can turn off timeslicing and get a full output of the curve you’re generating, and then plug that directly into the second input of the Lookup CHOP:

This gives you the ADSR controls you love from Trigger CHOP, with the easy and reliable controls of the Timer CHOP. Another trick is to do something similar with the Animation COMP. Here I made the default set of channels and just put a few keyframes into the Keyframe Editor. Nothing fancy. But instead of having the Animation COMP output the values, I set the Play Mode parameter to Output Full Range, which gives me the full curves which I can use with a Lookup CHOP:

Again, this gives us the power of using the Keyframe editor and drawing in our curves with the dead simple controls of the Timer CHOP. I’m not sure how I could sell you more on this…

What about the original question: TouchDesigner animation initialization?
You might be asking, “yes but what about initializing animation systems?” Well now with Timer CHOP, resetting an animation system based on Trigger CHOP ADSR is as simple as hitting Initialize on the Timer CHOP. Done! Resetting an animation system based on keyframes you’ve drawn into an Animation COMP is also as simple as hitting Initialize on the Timer CHOP. Done! Resetting and initializing any animation that’s feeding absolutely any type of multi-sample CHOP data you’ve fed into this system…is as simple as hitting Initialize on the Timer CHOP. That’s it!
Wrap up
Animation systems in TouchDesigner always appear trickier than they are. We get wrapped up in timelines, trying to make individual operators do everything, and we often end up frustrated. Luckily, we’ve got lots of tools to make this easy, especially when using Timer CHOPs and Lookup CHOPs, we can get the best of all worlds to create easy to control and use animation systems. If you want to take it a step further and learn how to make an animated GIF with TouchDesigner, check out our other blog post here. Enjoy!