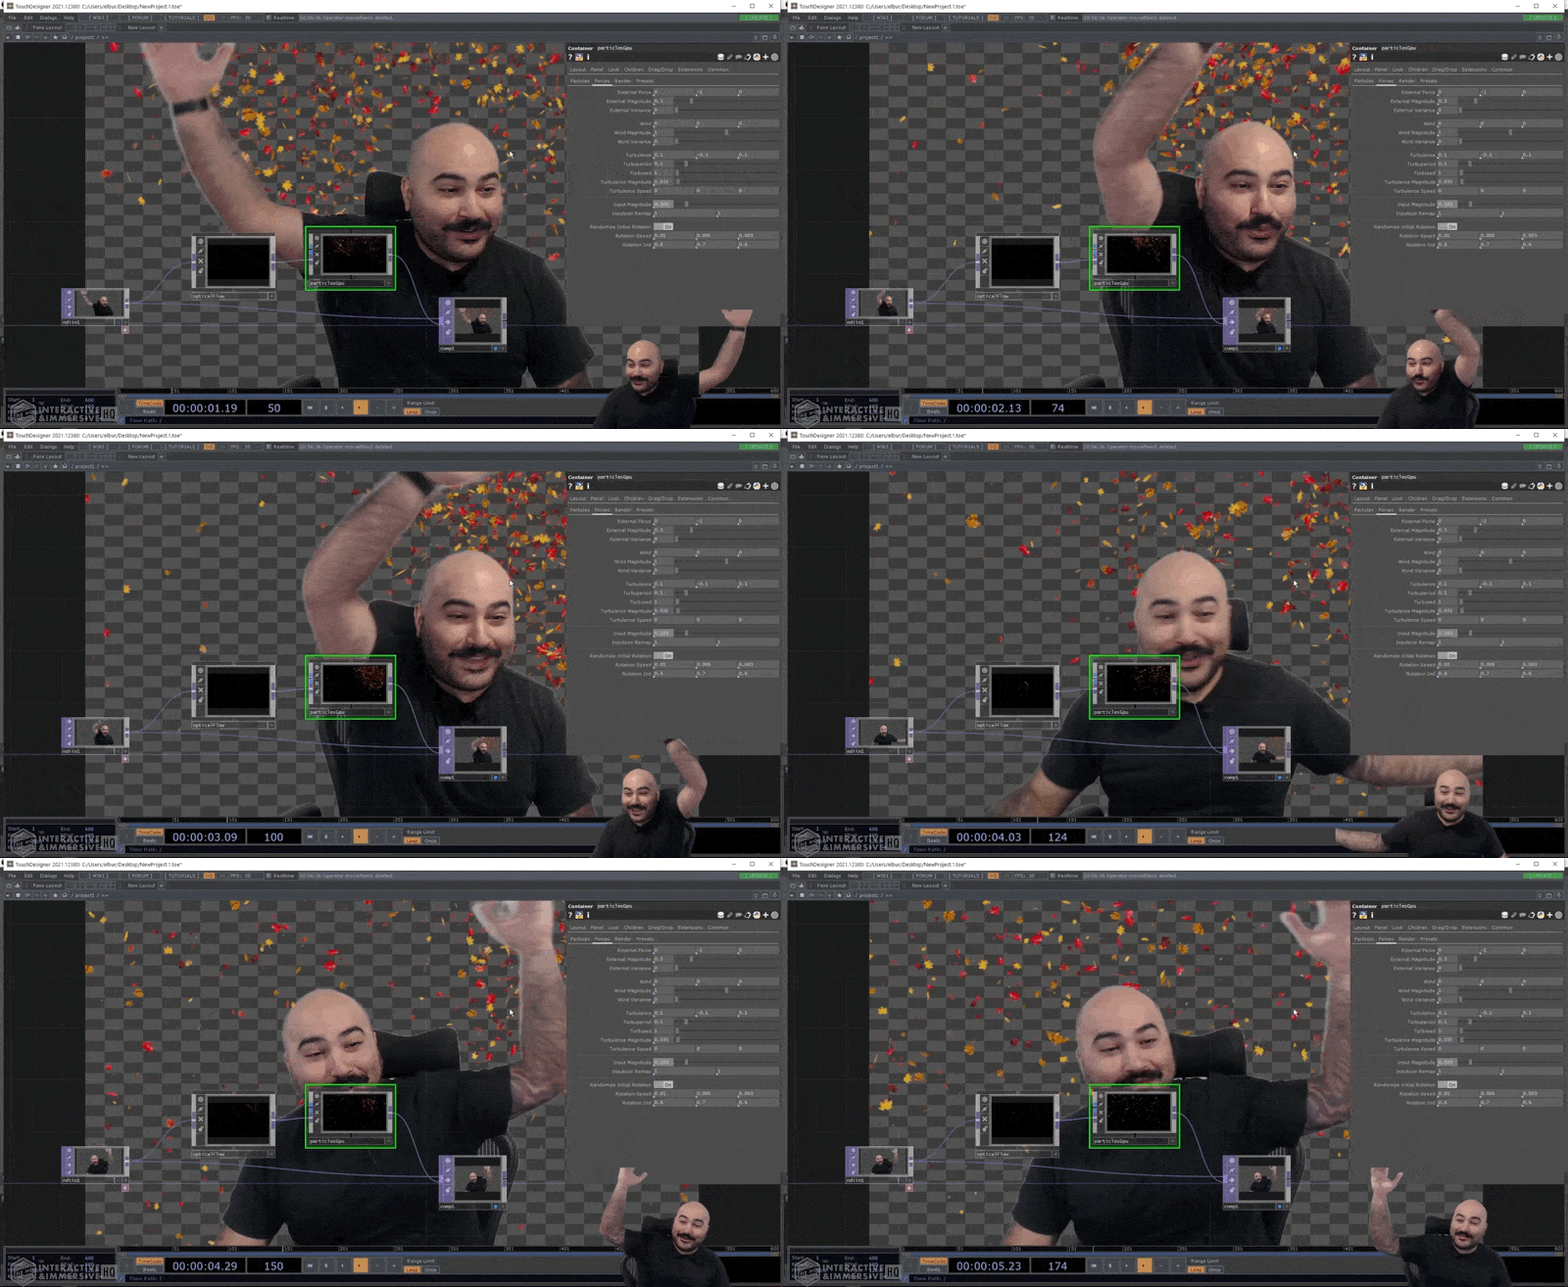
Hey folks, welcome back to another TouchDesigner tutorial. Today, we’re going to be having fun playing with some GPU particles and optical flow in TouchDesigner, with a few easy tricks.
If you need to brush up on your TouchDesigner basics first, refer to our TouchDesigner Beginner Tutorials.
Using only a few nodes in the network, I’ll show you how to create a particle system that responds to the motion of an incoming regular old RGB camera.
It’s a fun effect you can use on installations for events, or just about anything you want.
Optical flow is the main component that drives this effect, but if you’ve never played with optical flow before or have never even heard of it, don’t worry, I’m going to walk you through it.
Setting up Optical Flow
To set up, create an NDI In TOP and feed your camera feed into it.
Next, go to your palette browser (if you don’t see yours, go to Dialogs – Palette Browser).
Scroll down to the Tools section, and drag and drop the opticalFlow component into your network.
When you plug your camera into the optical flow, you’ll see some weird outlines and edges that are all green or red or somewhere in between.
What this means is it’s calculating the motion vectors that are happening inside of the image.
It’s using the previous frame and the current frame, detecting what edges have changed, and then what direction they’ve been changed in.
It then writes that to the red and green channels.
When To Use Optical Flow
Using optical flow is really cool because you can use this on any regular old camera feed, there’s no need for a green screen or a key.
You could even plug in something with no alpha, and get those same motion vectors inside, showing the changes in movement.
Optical flow is a tool that you can use in a lot of different simulations, and you’ll often see it used with particle systems and fluid systems.
Any of these kind of systems in installations where someone’s moving and all of a sudden, all the particles start to go in certain directions, a lot of this is based on optical flow inputs.
Get Our 7 Core TouchDesigner Templates, FREE
We’re making our 7 core project file templates available – for free.
These templates shed light into the most useful and sometimes obtuse features of TouchDesigner.
They’re designed to be immediately applicable for the complete TouchDesigner beginner, while also providing inspiration for the advanced user.
Connecting Optical Flow to a Particle System
Whatever kind of input you use is usually going to denote how you can work with the optical flow.
In our example, one really easy thing to use (that’s also inside of the palette), is particles GPU which is a really great GPU-accelerated particle system.
Particles GPU has a lot of the same properties and parameters as the Particle SOP, but converted into a GPU-accelerated version.
It has two inputs: one of them is a SOP, and one of them is a TOP, and if you hover over that second input (the TOP), you’ll see that it says “inOpticalFlow”.

Create a particlesGpu COMP in your network, then grab the output of the optical flow and plug it into that second input of the particles GPU.
Start to wave your arms around a bit, and you should be able to see some of that force affecting what’s happening inside the particles GPU comp.
Right now it’s not a lot, and honestly it might be too subtle for most use cases, but next we can start editing the parameters.
Adding a Composite TOP
Close your palette browser to get it out of the way. Now, we can composite the output from our particle system with our camera feed.
Go ahead and create a Composite TOP, and plug the particles GPU and your NDI video input into it.
By default, the operation parameter of the Composite TOP is set to “multiply”. Change that parameter to “over”.
At the bottom of the parameter window you can decide if you want the camera underneath or on top (I’d advise to click on top in this case because it’s easier to see what’s going on).
If you move very quickly, you get some motion happening, but it’s not really that fun yet.

Adding Force
One of the things that you’re going to learn about dealing with optical flow is where you want to actually create some of that force and strength.
One option is actually on the Optical Flow COMP itself.
On that COMP, find the force parameter, and turn that up higher to number two.
Now there’s already extra forces being generated in those motion vectors, and it’s a lot easier for you to interact with those particles in the particle system.
In most cases, most of the systems that you use will have their own ability to multiply that input force of the optical flow. From my experience, optical flow takes some tuning in, it takes some time to get it exactly how you want.
Once you get it set up and you have your camera and your content going in, it’s a normal process to be playing with particle size, multiple forces, the simulation, and the environment, just to get that right feel for the context and everything happening on screen.
Adjusting Particle System Parameters
If you’ve never worked with particlesGpu before, don’t worry, it’s very easy to use.
On the operator’s particles parameters page, a lot of them look very similar to what you’ve seen before on a Particle SOP.
You can increase or decrease the particle count, change the lifetime, the variance of the lifetime, the particle size, all those great parameters that we’re used to.
On the forces parameter page, there’s also very similar forces to the ones found on a Particle operator, like external forces, winds, turbulence, all that good stuff.
Input Magnitude Parameter
We want to pay attention to the parameter named “input magnitude”.
This is a parameter you have to be very careful with, and I highly suggest moving it in very small increments, because if you move it way too far too fast, everything goes crazy.
By default, this parameter is at 0.01 right now. Slowly start to turn that up to about 0.1.
Now when you move your head even slightly, there’s a lot of motion from the particles, and if you move your arm around, there’s even more.

This may very well be too much already, and that’s why I said you have to be very careful with this slider; even just increasing it to 0.1 makes it a pretty extreme effect.
Drop the parameter down to about 0.07 if you prefer.
Now we’ve already created this really nice, easy-to-use, interactive particle system with only a few nodes.
Particles GPU Render Parameters
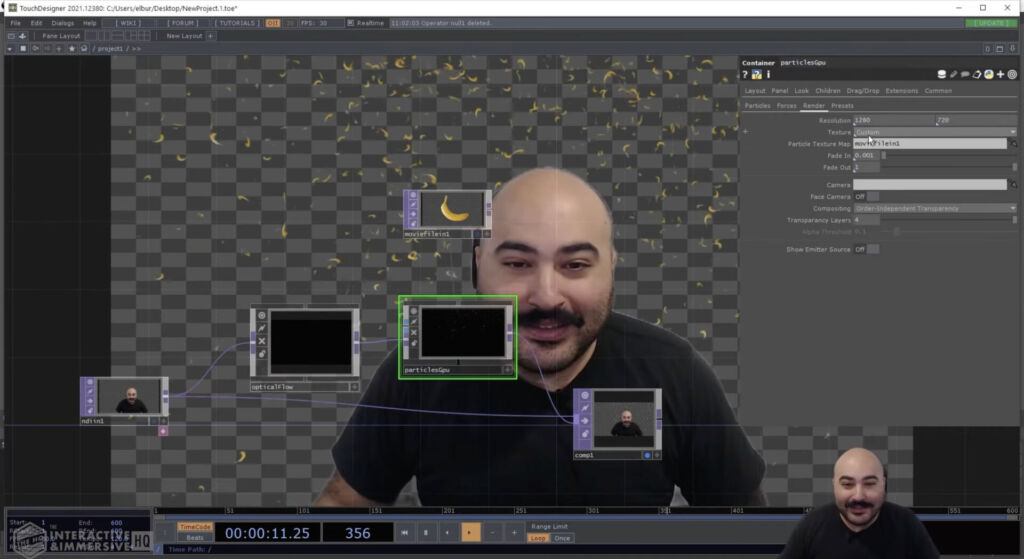
On the render page of the parameters is where you can set your output resolution.
By default, it’s 1280×720, and that means that the texture coming out of the particles GPU is also going to be 1280×720.
The texture parameter is where you can assign the look of these particles. The one we’ve been using so far is the default “leaf” preset.
However, you can also change it to square (this one is really nice for development because you can very quickly and easily see all of the different particles flying around).
There’s also a circle texture, snow texture, or you can set it to custom and then add a custom texture reference in the “particle texture map” parameter.
Add a Movie File In TOP, drag that over to reference it to the particle texture map, and then you’ve created a particle system of bananas!

Face Camera Button & Presets Menu
One other parameter that’s very useful here (still under the render page) is the face camera button.
In some cases, maybe you just want these orthographic planes, you don’t really want all this crazy rotation in the particle system.
If you hit the face camera button, then all of your particles will be facing forwards.
Particles GPU also has a nice preset menu where you can lock in certain settings. You’ll find this under the presets page of parameters.
Once you’ve set the number of particles, particle size, lifetime, all the different kinds of forces, then go to the presets page, and type in a name in the “preset name” parameter.
You can make as many presets as you want with different looks and different effects and then actually blend between them in your particle system using the “recall” and “blend time” parameters.
Wrap Up
Optical flow is a really great tool because of how easy it is to set up and also how versatile it is with different kinds of inputs.
This effect even works without any keying or background removal because it’s actually working on the differences between the frames.
This can be something you can use with even a regular old webcam, on any kind of hardware. It works well with Kinect depth maps and point clouds as well; it’s very versatile and very easy to use.
I hope this tutorial gives you an easy overview of particle systems. It can be a neat TouchDesigner technique that you can put in your back pocket and use for any of your future projects.