
It’s been six months since the arrival of the 2022 release of TouchDesigner! This marked a transition that brought together, even more so, the visual and audible worlds within our beloved software. Through the native support of VSTs in TouchDesigner, the audiovisual possibilities have increased immensely for artists and programmers. So, in this post we’d like to leave you with some organization and optimization tips for your audio workflow.
Have you delved into this universe yet?
If not, let me remind you of our recent blog posts that will help you learn how to install VSTs, as well as give you some free VTS options to get your library started!
Organize your VST Library
Now, one thing I must confess is that I have a lot of VSTs in my computer! And, although I use the majority of them, I’ve found that with time one tends to gather a family of tools that are present in practically every project worked on.
With that in mind, I recommend taking the time to explore the vast available possibilities for VSTs and curating a set of tools that resonate with your practice. It’s easy to continually add new VSTs to your library and end up using very few of them so, better to be effective and optimal with your VST organization.
Once you’ve done this I find it helpful to have a basic file system that allows for a classification of the plug-ins and their use. Here’s an example:

The benefit of this is that when we’re working inside of TouchDesigner we’ll have a much easier time navigating our plugins via what they do than by the company that makes them (which is the default sorting in most DAWs).
One last thing I can recommend in terms of this is to force yourself to go through your VST folders at least twice a year and… get rid of what you’re not using! It is sometimes difficult to unclutter our digital library because we might think: “Oh, I’ll need this for later” but it is best to embrace what your practice reveals and stick to the tools that benefit it!
CPU Optimizations
All right, let’s say you’re currently using VSTs in TouchDesigner. Here are some tips to keep your workflow clean and prime.
Let’s think of a sound designer working in Ableton Live. It is good practice to avoid putting unnecessary pressure on the CPU capabilities of the computer, and therefore we should strive to organize our TouchDesigner signal flow and VST usage in the best way possible.
For instance, if these were all the plug-ins used in an audio channel, what would happen if we had ten similar audio channels, all using the same effects separately?

We’d be wasting CPU power in tasks that could be optimized through a better application of our VSTs and a better development of our signal chain. In the audio world this is called a “bus.”
How does an audio bus work? Well, multiple audio channels are routed into a single track, and subsequently processed as a whole. Taking pressure off the CPU and minimizing the effort needed to process our audio. This is a technique used in cases where we have a “family” of similar or related sounds, for which we would want a general processing and not an individual and separate approach. You can think of examples like grouping percussion elements into a bus or grouping all the vocals into a single bus. The image below shows a bunch of channels all feeding into a single bus that holds our effects chain:

Doesn’t this sound familiar to you? We use this technique as well in TouchDesigner! Think about it: when we have several CHOPs and we want to apply some processing to all of them we will often merge or join the data before doing so.
We usually don’t apply a Math CHOP and Filter CHOP to every single operator before we merge them together, especially if the parameters on all the filters/maths/etc are the same, like this:

When we can, we often merge all our data first and then use a single operators to save on CPU usage, like this:

Same Signal, Different Processes
A common misconception is that we take one audio signal and send it through one signal chain to process it. But often, in professional settings we take a single signal and send it through multiple processing chains, and use the different result to drive different parameters or create varied effects.
One example would be, in audio analysis we split the signal into three different signals for the low, mid and high frequencies.
Another example would be when we want to add reverb to our signal, we often want to exclude the lower frequencies from the reverb in order to avoid muddy sounds. In this case we would send the original signal through one processing chain that affects the full spectrum of frequencies, while we send another version of the signal without low frequencies to a reverb, and then we would add that back onto the original signal. At the end of the day, one signal doesn’t mean one single chain is all you have in your creative toolkit.
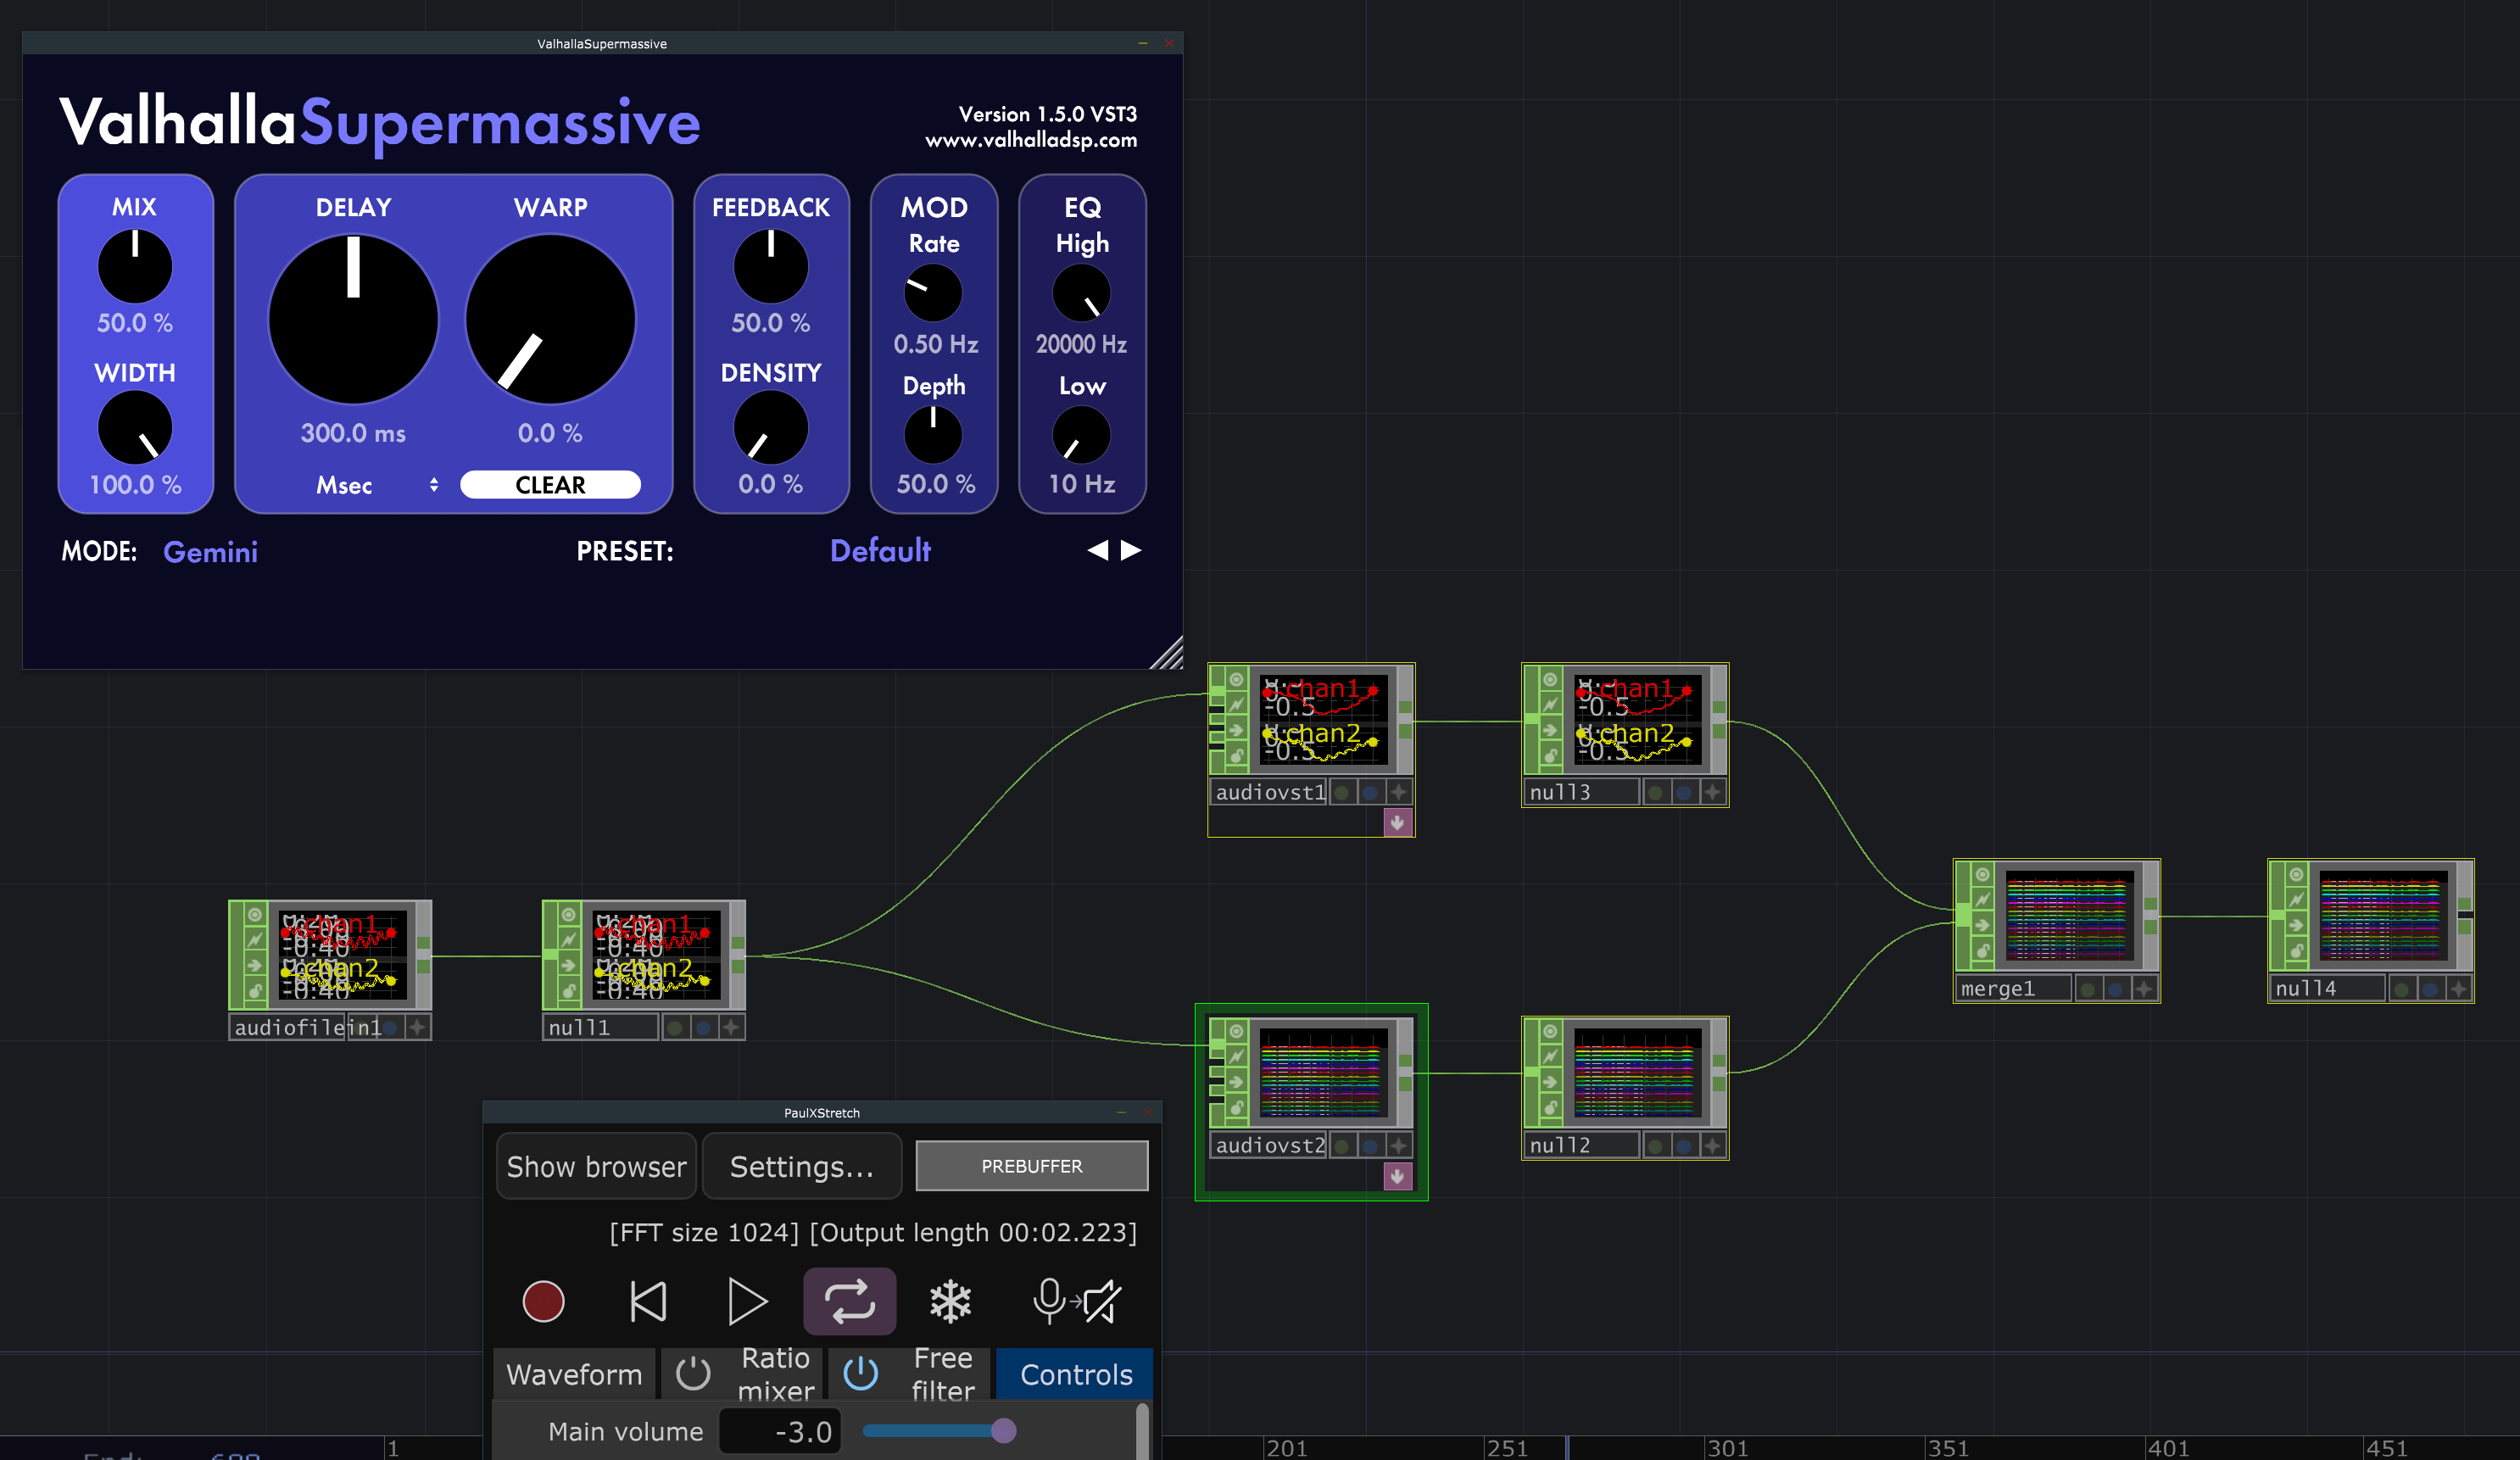
In this example, I have an audio signal being split into two different effects. First we have Valhalla Supermassive Reverb, and Paul Stretch underneath. Lastly the signals are merged in order to be utilized further down the chain.
Get Our 7 Core TouchDesigner Templates, FREE
We’re making our 7 core project file templates available – for free.
These templates shed light into the most useful and sometimes obtuse features of TouchDesigner.
They’re designed to be immediately applicable for the complete TouchDesigner beginner, while also providing inspiration for the advanced user.
Common Signal Chains
Even though it is important to have an experimental approach when setting up your audio signal chains, there are some common configurations that might help you get started with your own chains. A popular setup might look something like this:

Initially you want to get started with some sort of equalization or filtering tool. This allows you to refine the incoming audio and isolate specific frequencies before applying further processes to it. Then, comes the creative section where you apply different effects to your audio. The chain is then finalized by having a compressor in order to control the dynamic range of your audio, commonly reverb is added after this to put the sound in a space, and then finally a limiter, which will help you avoid clipping and distorting your sound.
Starting with this time-tested effect chain can help give you a bit of structure to work within while being creative in the middle of the chain.
Wrap Up
Now we have some ideas that we can experiment with: organize your VST library, take advantage of common signal chains, try processing the same signal in different ways, and setup your signal chain to best take advantage of your system’s resources.Be aware of your tools, their capabilities and how you use them, although I must say that breaking these rules is good practice as well.
Have fun exploring!
