There are so many things TouchDesigner does out of the box that other softwares can’t do. Playing back dozens of layers of video, connecting to all kinds of hardware I/O, connecting to web APIs, and creating whole new sub-applications with Python are just a few examples. Some of the things that are still not out-of-the-box easy are a lot of common rendering tricks and post-processing functions you would normally do. Matthew Ragan has created a course for the HQ PRO this month that covers all the different aspects of rendering in TouchDesigner and in this post I’m going to share a quick way to setup Depth of Field.
Depth of Field in TouchDesigner: First steps
The first thing you need to do is create a scene that will lend itself to depth of field. This means you want a scene with depth in it! To make this quick and easy I’ll use a Grid SOP and I’ll instance Box SOPs on the Points (Don’t worry, project files at the end!):

Now that we have our scene we need to setup a basic render setup with a Render TOP, Camera COMP, a Light COMP, and a Phong MAT on our geometry.

So far so good! Now is where the magic comes in.
The Depth TOP
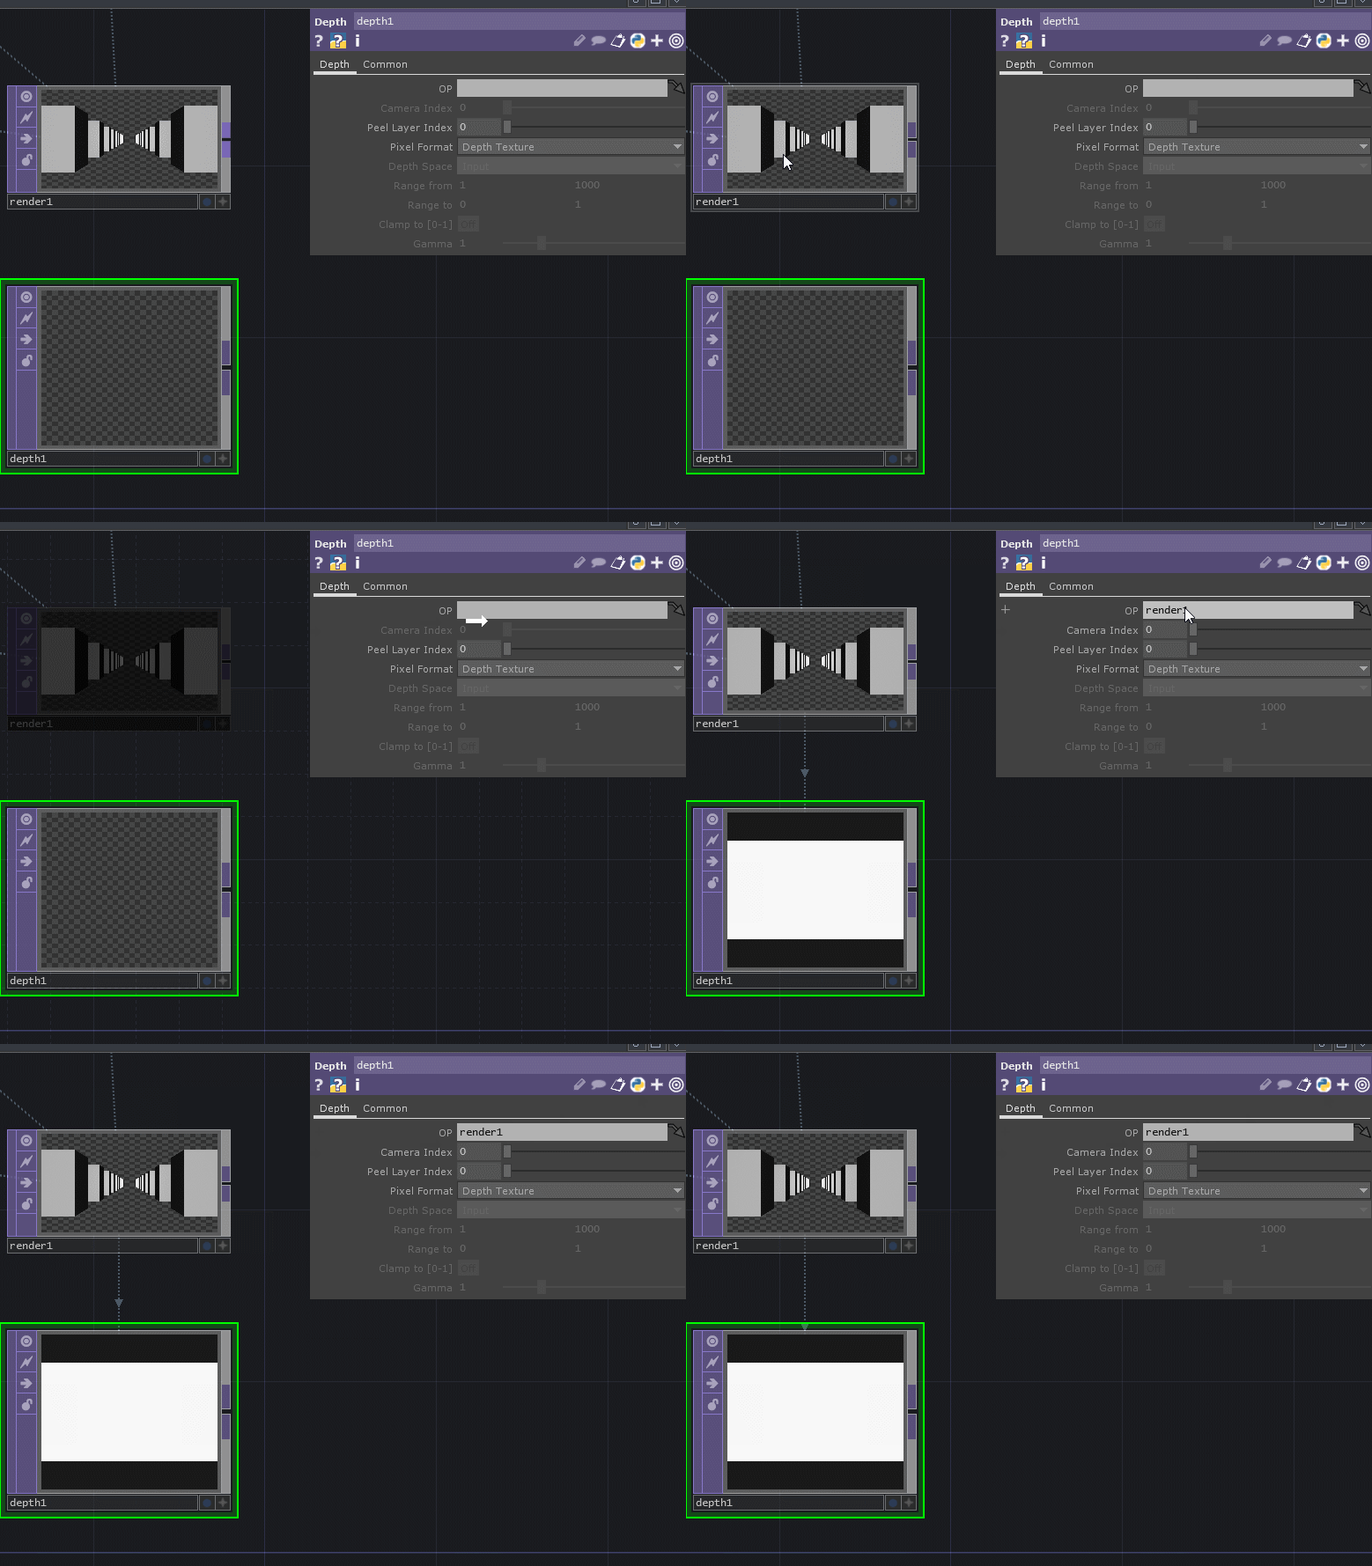
The Depth TOP is really interesting and often ignored. It reads the rendering data from a Render TOP and returns to you a black and white texture representing where in 3D space things are in the scene. Sounds simple? Yup. But how do you use it? Well first let’s get it setup so that it has a usable range for us. We’ll start by making a Depth TOP and connecting the Render TOP to it’s OP parameter:

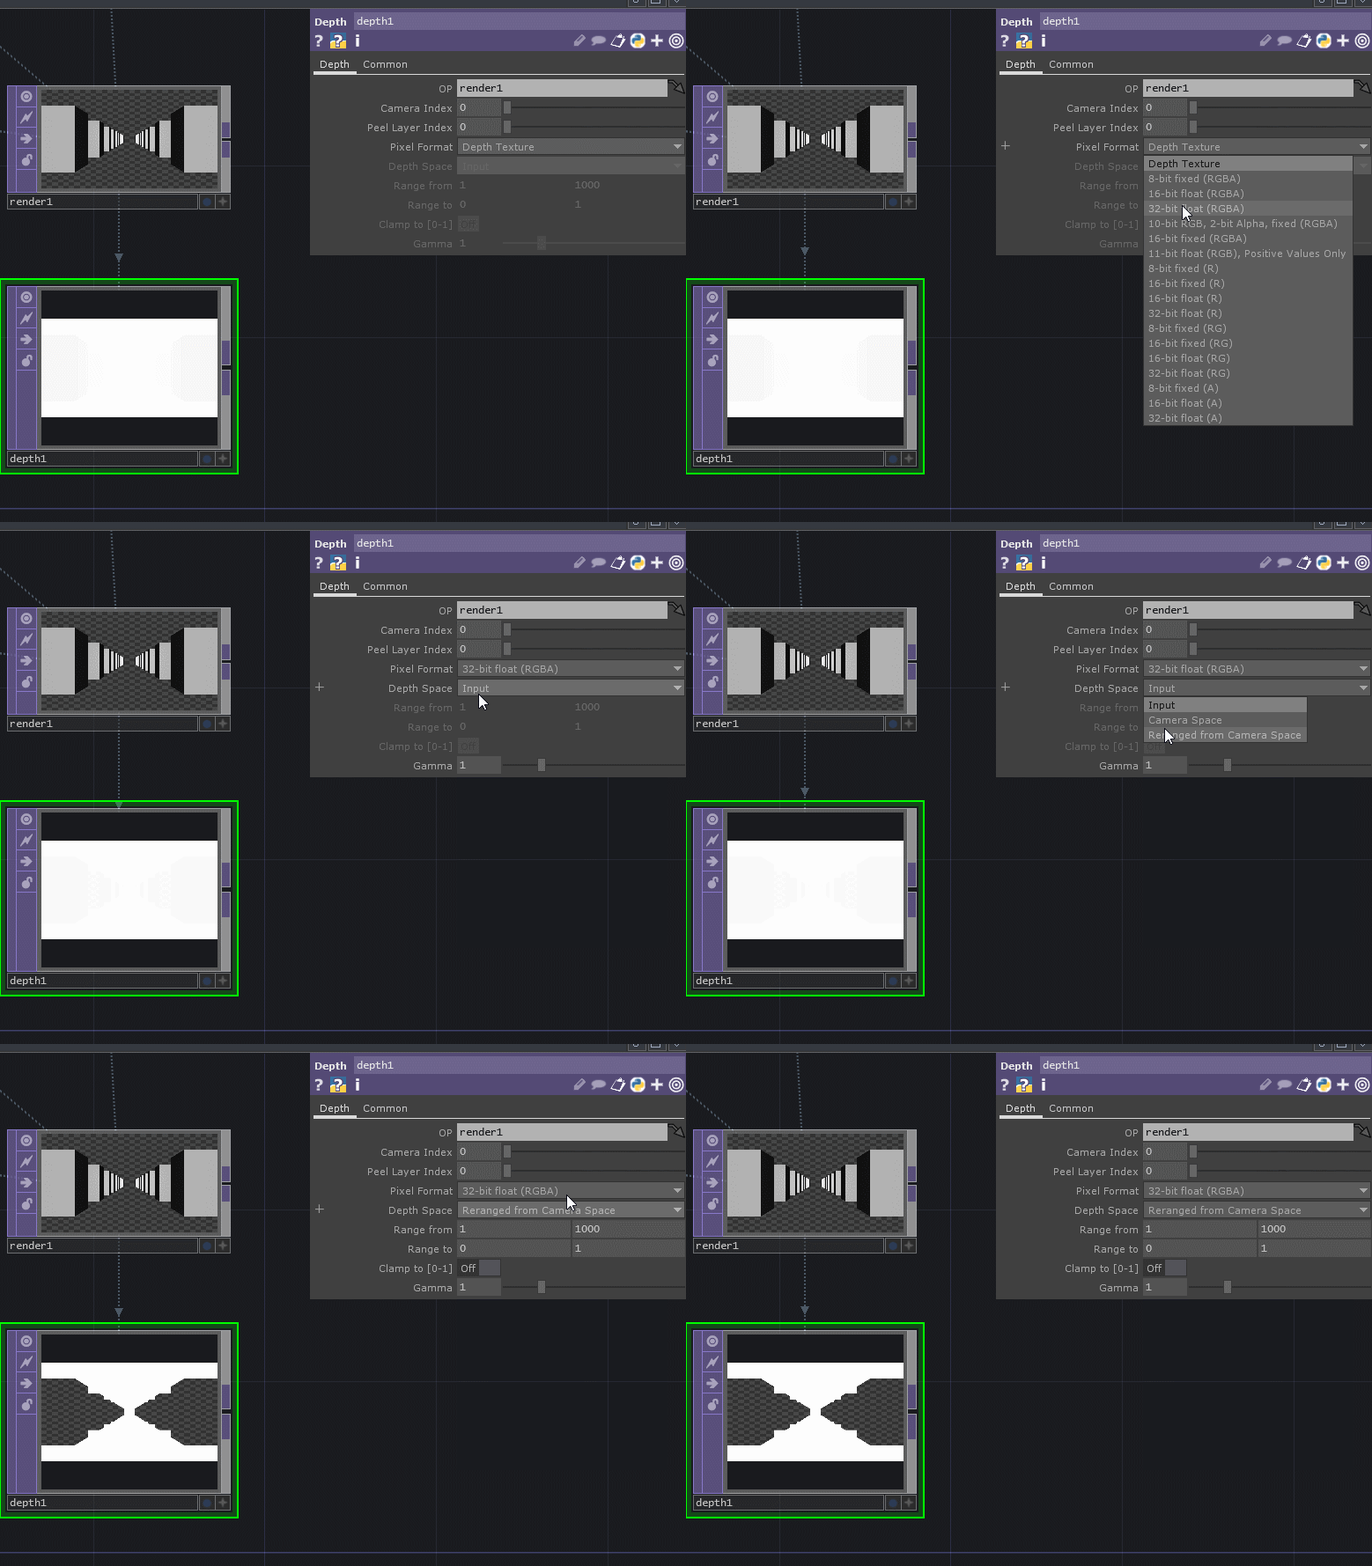
Now you’ll probably see a very white texture with a bit of shading inside of it. This is great if you’re doing some more advanced usages of the depth map, but for our usage, we want to have a more pronounced black and white texture we can feed into our next step. What we can do is change the Pixel Format to 32-bit RGBA and the Depth Space to Reranged From Camera Space:

This gives us a lot of useful things we can do as you can see from all the extra parameters that become activated. You’ll also notice that our depth texture is much more pronounced. With the default settings, all of the objects in our render become RGBA of 0,0,0,0 or you can think of them as empty, and the rest of the scene is white. Great! We’re almost there!
Magical Luma Blur
Luma Blur TOP is an amazing tool I don’t see used often enough. We’re going to use it now to create our depth of field look, but it can also be used in a bunch of other situations. What it does is it acts like a Blur TOP except using a second input, you can apply blur to different parts of the image based on a black and white map. By default, you’d set it up so things that are closer to white in your second input will get lots of blur applied, and thing that are closer to black and get less blur applied. We’re going to use this with out depth texture shortly, but it can also be a really cool effect to use things like Edge TOP as your second input, then you can effective blur the edges inside of an image without blurring the whole thing. Back to our goal though! Let’s go ahead and make a Luma Blur TOP and connect our render to the first input and our depth map to the second:

Believe it or not, we’re almost done! Now we just have to rerange our depth texture values and adjust how much blur we want! Easy peasy!
Adjusting the values
When thinking about how to rerange your camera space in the Depth TOP, it’s also good to know how big your 3D scene is. We know that our Grid SOP is a size of 50 by 50 units and it’s on the origin of 0,0,0. This means from the origin, our grid extends 25 units on the Z axis. Our camera is at 0,0,5, meaning that from the camera to the back of the grid is 30 units. If you have trouble doing this kind of math in your head, it’s very easy to draw a quick sketch on a napkin and map out all your units and geometry sizes!
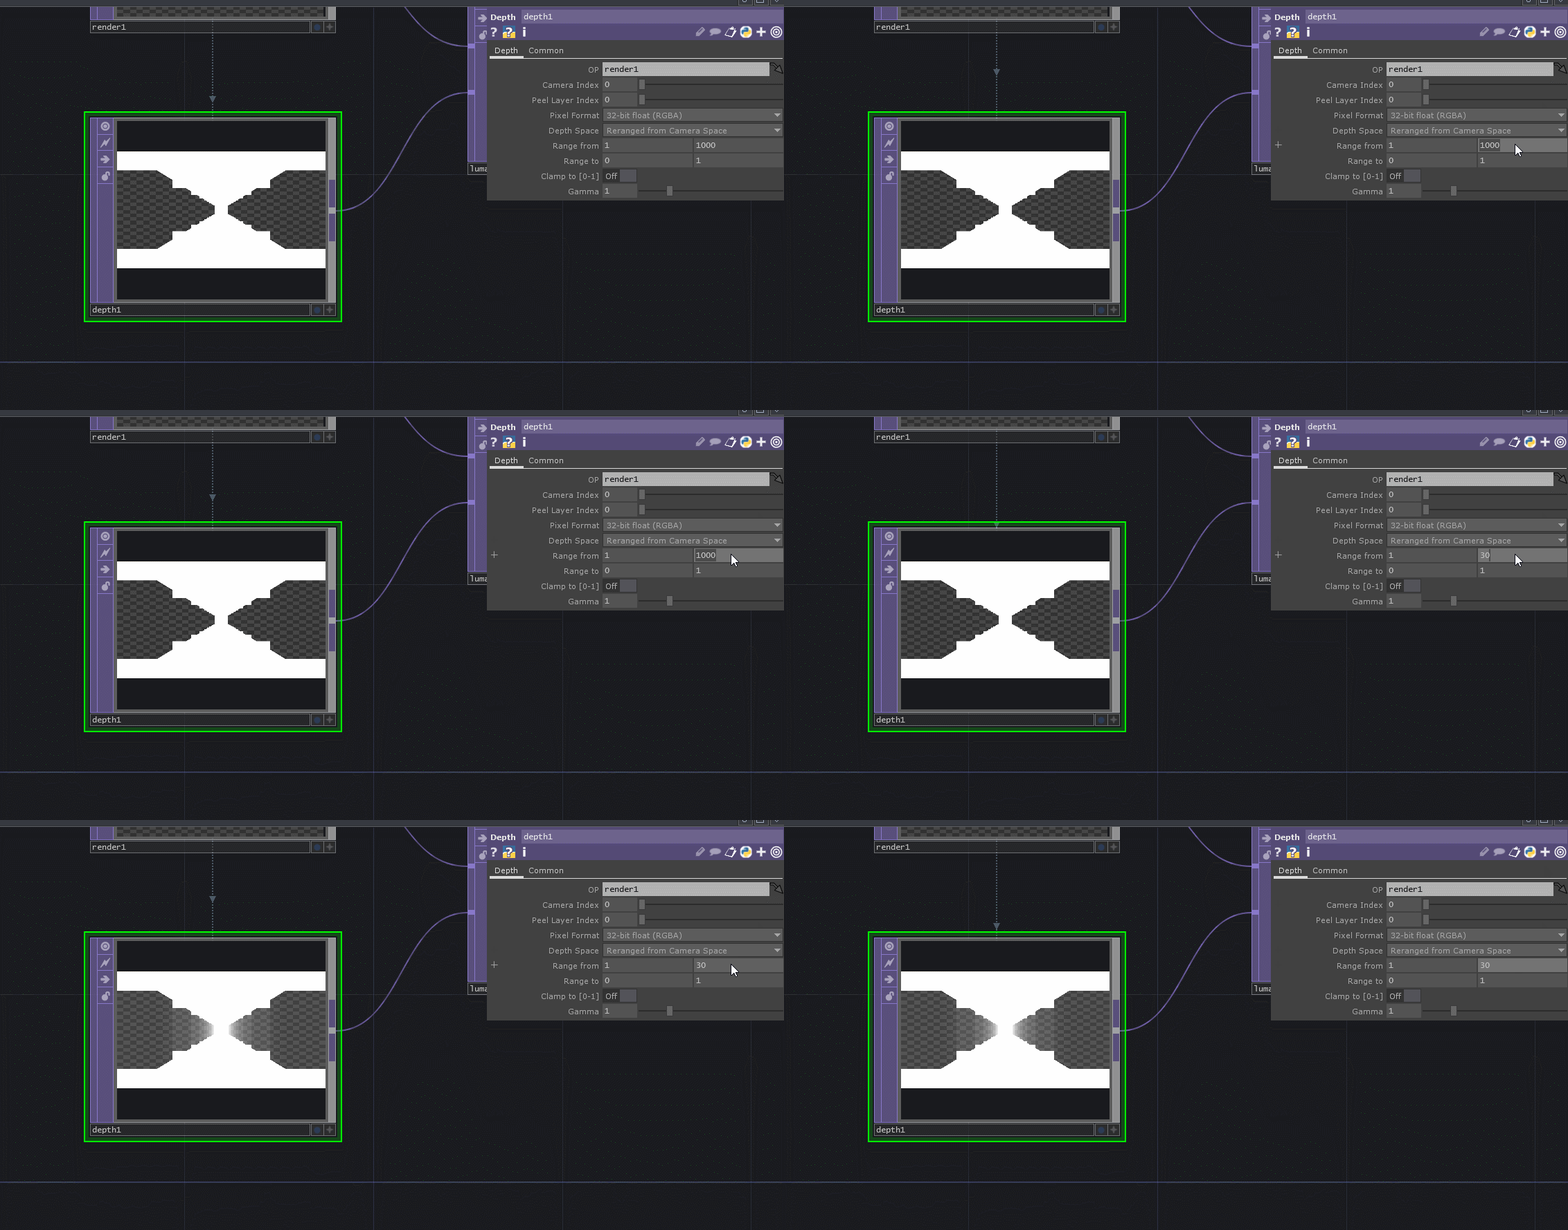
So let’s go ahead and enter 30 into the Depth TOP’s second Range from parameter:

You’ll immediately notice something cool will happen when you do that: the texture starts with sharp black boxes at the beginning, but the farther away from the camera the boxes get, they become lighter, until it starts to look kind of hazy. Great! Now we can go to our Luma Blur TOP and turn up the White Filter Width parameter, which increases the level of blur applied to white areas of the map:

Great! Now the farther away from the camera something is, the more blur is going to be applied to it. From here, it’s just a matter of tweaking to your liking. Want more blur on the edge? Turn up the White Filter Width on the Luma Blur TOP. Want the depth of field blur to start earlier on the far away objects? Turn down the second Range From parameter in the Depth TOP. Want the closer objects to have less blur applied to them? Increase the first value in the Range From parameter of the Depth TOP. It’s all up to your tastes!
Get Our 7 Core TouchDesigner Templates, FREE
We’re making our 7 core project file templates available – for free.
These templates shed light into the most useful and sometimes obtuse features of TouchDesigner.
They’re designed to be immediately applicable for the complete TouchDesigner beginner, while also providing inspiration for the advanced user.
It’s alive!
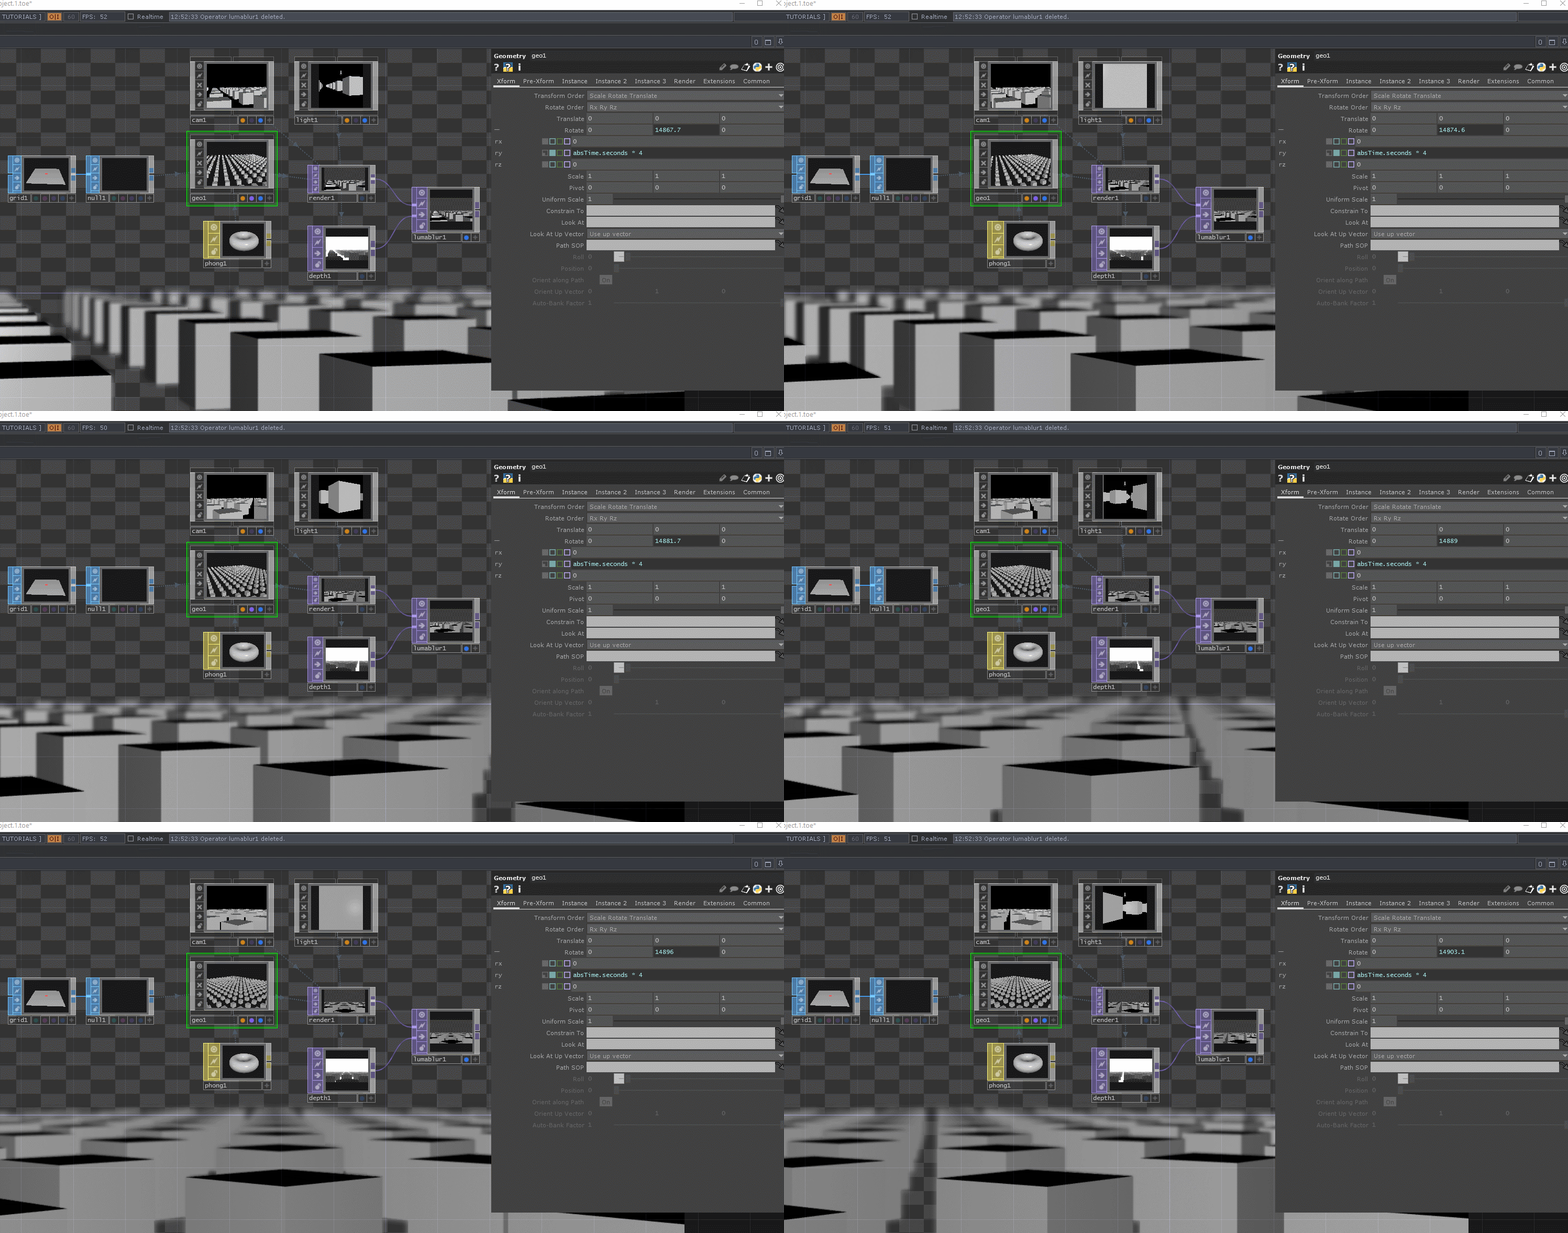
The great thing about this effect is that it’s dynamic! If we start rotating our grid or moving our camera, the depth of field will still be applying:

There you have it! With that, you know how to create a basic and effect depth of field blur effect on your render setups. You can tweak to your hearts content, just always make sure you’re adjusting the Depth TOP range settings if you’re changing your scene around.
Project file
You can download the project file for your reference below!
Wrap up: TouchDesigner Depth of Field
Whether you’re making a complex scene or a simple render, you can’t overlook the impact that some simple post processing effects will have on your render. As I mentioned at the beginning, if you really want to deep dive into creating high quality renders in TouchDesigner you can join the HQ PRO where we have just released a new training from Matthew Ragan on all the different ways you can create pristine looking renders in TouchDesigner. Enjoy!