There are tons and tons of tiny techniques inside of TouchDesigner that are easy to miss (especially if you’re a beginner). One of the techniques I find most developers don’t take advantage of is Grouping in SOPs. It allows you to create sub-groups of points or primitives inside of a single SOP and then selectively decide which group certain SOPs affect. Sound useful! Let’s get using it!
How can you group?
Without getting too deep into the weeds, it’s nice to understand why grouping even works. Inside of every SOP is a cool data structure. This data structure is called the Geometry Detail. It is how data is stored and organized inside of a SOP. There’s a nice diagram on the wiki about how this works:

There’s a lot going on in here! In The HQ PRO’s SOPs Demystified workshop, I explain the concept using a simpler diagram:

That’s all there really is to it. Inside every SOP is a Geometry Detail. This Geo Detail consists of a list of Points and a list of Primitives. The points in the Points list can be on their own or they can be part of a primitive, thus the arrow going back and forth between those two. On top of that, you can have different groups of points and different groups of primitives based on different selections from the points/primitives lists.
You could go deeper into the intricacies of the Geo Detail, but for our purposes, it’s just nice to know that this grouping is non-destructive and just a nice way that we can create different selections from our points/primitives and selectively apply processing to them.
Here’s the reference for it if you’d like to learn more:
https://docs.derivative.ca/Geometry_Detail
How do we do SOP Grouping in TouchDesigner?
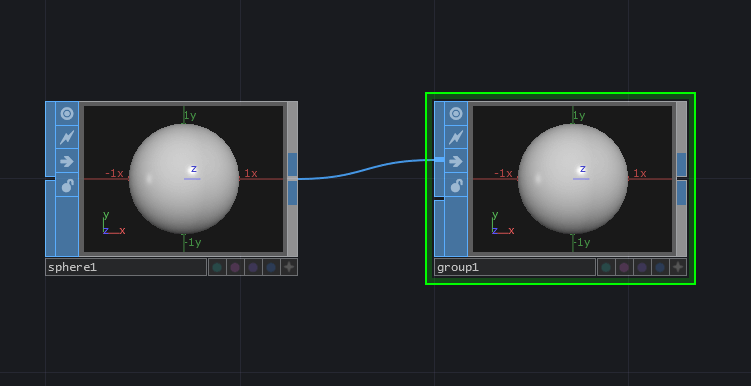
In our network, all of our grouping is going to be done with the Group SOP. Let’s start with a simple example. I’ll make a Sphere SOP in my network and connect it to a Group SOP:
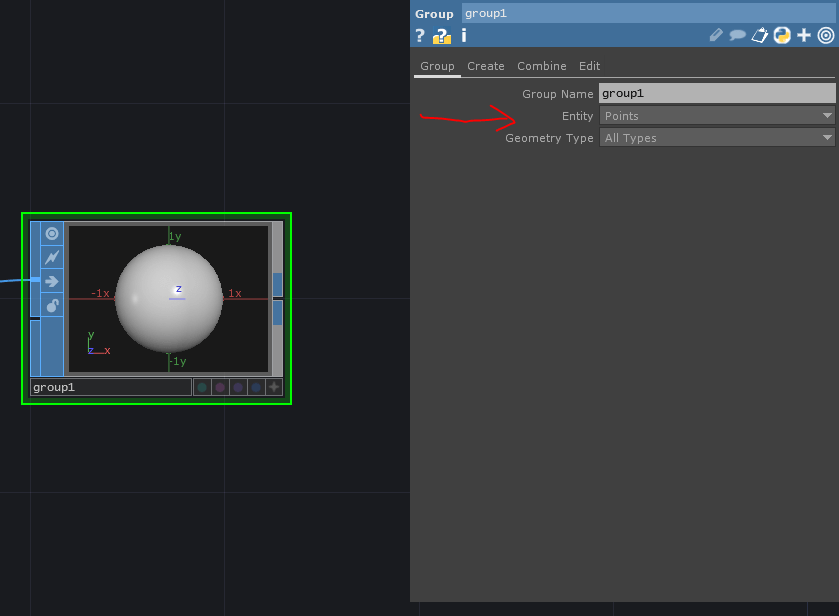
We can then go and look at the parameters for the Group SOP. We’ll see on the first page we have to decide if we want to group points or primitives, and in this case we’re going to switch to Points. We can also give the group a name. For simplicity, I’ll just leave this group named group1:
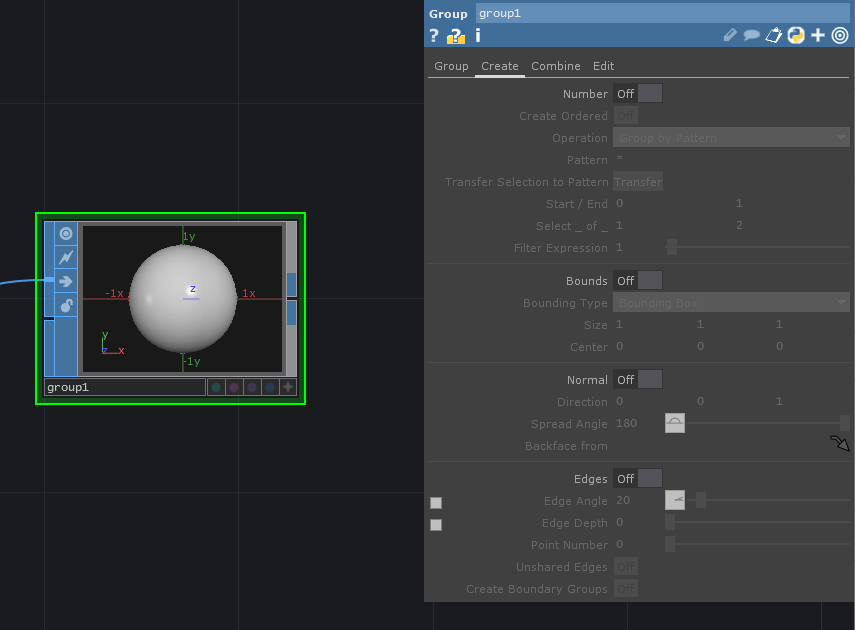
Now we can go to the Create page of parameter and actually decide how we want to pick the points that will be in our group:
Selecting points by number
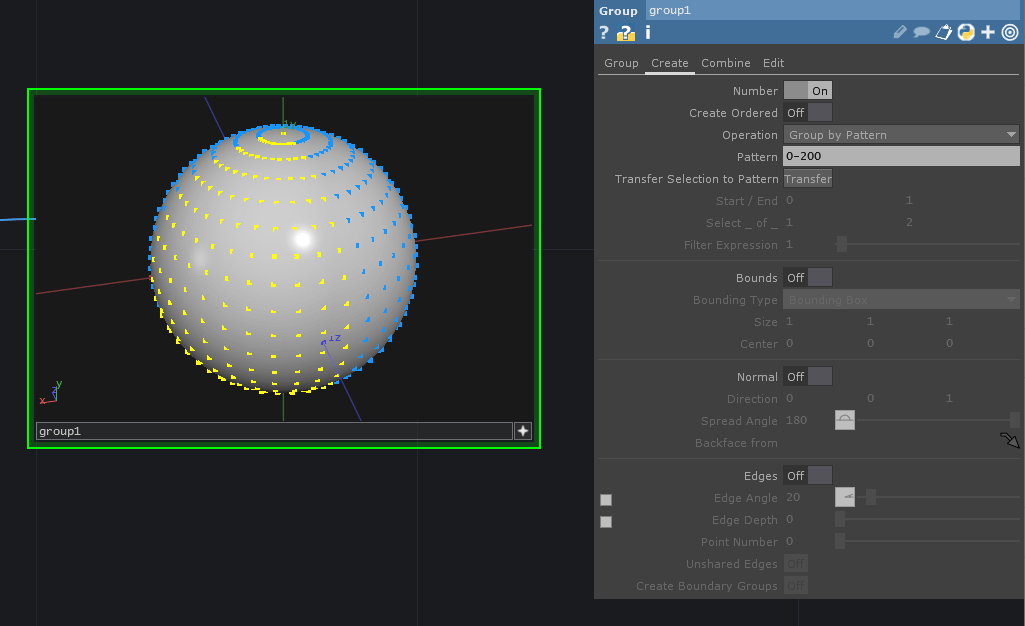
As you can see, there’s a lot of different way we can do this! It can feel overwhelming for some users, but don’t worry, there are two easy ways we’re going to look at today. The first is to do them by point number. I’ll go ahead and enable the Number toggle and we’ll see all the parameters under it will become active. We’ll also see all the points on my sphere become highlighted yellow in the Group SOP:

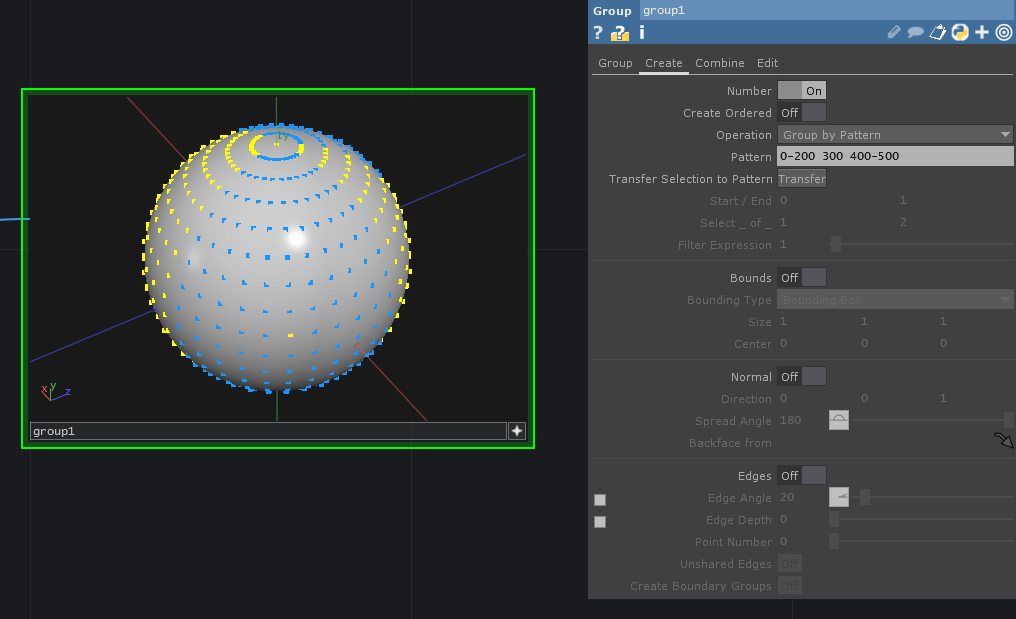
The yellow points are indicating all of the points that are being added to the current group. In the Pattern parameter we can see a * which means “select everything.” You can do a lot of easy expression to select your points here. If we wanted from points 0-200 we could type 0-200 and then look at the viewer of our Group SOP and see only some of the points are selected now:
You can then further select more ranges or even individual points by adding a space and then typing in the other points. So we could for example type an expression like:
0-200 300 400-500
And that would give us all of those points in group1:
Before we dive into processing the points in this group, let’s also try using the bounding box.
Selecting points with a bounding box
Selecting the points to group based on a bounding box can be more intuitive in a lot of use cases. To do this, we can turn off the Number toggle we had turned on earlier, then we can turn on Bounds. From here, we can decide on a bounding box type, its size, and center. For this example we’ll keep using a standard bounding box volume and I’ll increase the size of it till it’s visible around my sphere:
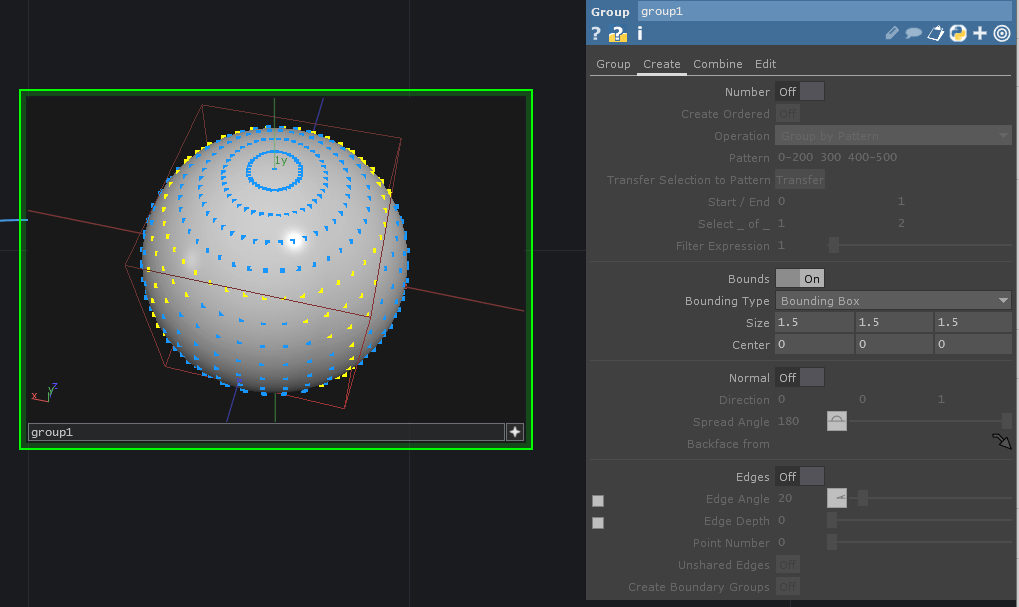
We can see that any of the points that are inside of the bounding box’s outline are highlighted yellow and added to the group, and the ones outside of it are still blue. You can configure this however you like really easily. I’ll move my bounding box and grab the bottom half of the sphere:

Great! So now let’s finally start putting this group to work!
Get Our 7 Core TouchDesigner Templates, FREE
We’re making our 7 core project file templates available – for free.
These templates shed light into the most useful and sometimes obtuse features of TouchDesigner.
They’re designed to be immediately applicable for the complete TouchDesigner beginner, while also providing inspiration for the advanced user.
Processing SOP Groups in TouchDesigner
Processing groups is just as easy as making them. You may have noticed this before and never known what to do with it, but tons of SOPs have a Group parameter. Let’s take a look at two examples. First we’ll connect a Transform SOP after our Group SOP:

What we’ll notice right at the top is a string menu parameter named Group. The cool thing about this is that it will automatically detect all the groups and you can pick which one you want to process from the drop down on the right:

We’ll go ahead and select group1 from the dropdown. Now the magic happens. Any of the processing the Transform SOP does, will only be applied to points inside of that group! So if I was to translate 1 unit to the left, we’d see something like this:

Nice! Now this isn’t the most creative example, but once you know how groups work, you’ll start to notice all of the different SOPS that have this functionality built in. For example, we can delete our Transform SOP and create a Noise SOP instead. Noise SOP also has group processing built in. Here we can see the Noise SOP processing the whole geometry because we haven’t selected a group yet:

And then once we select our group in the Group parameter:

Now only the points selected in our group are affected! That’s all there is to it!
Wrap up
Grouping is an awesome technique to use. It reduces the amount of times you’ll have to split geometry into separate SOP chains because you can use grouping to selectively process points or primitives in your SOP. This creates cleaner networks and more easy to follow processing chains. Enjoy!