So adding onto a previous blog I did where we went over all the different ways that we can connect TouchDesigner and Unreal Engine together, it’s worth spending some time digging into a single case with more depth.
In this case, I want to outline a situation where we receive data and then route that into TouchDesigner. We’ll do some minimal processing, then pass that over into Unreal. It’ll be a great template for you to see the flow of data and how Touch is the brains of the operation and Unreal is all aesthetics.
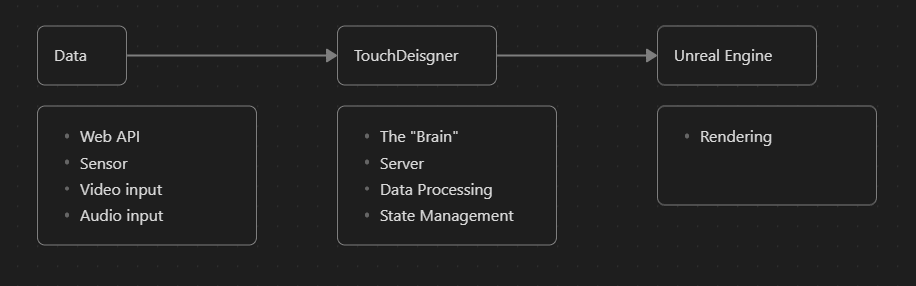
Above is the general idea of how we want data to flow in our application. We pass data from one source into TouchDesigner, this could be from an external API, a physical sensor, a camera input, you name it. We’ll ingest this, process this into our application state, and then route what we need for rendering into Unreal.
The Unreal x Touch workflow works like this with some exception. There might be two way communication between Touch and the Data source or Touch and Unreal if we need to do some additional post processing of the render. Don’t worry about that for now.
I’ll sketch the general idea of how this workflow goes with a specific project but not get onto specifics too much.
The Goal
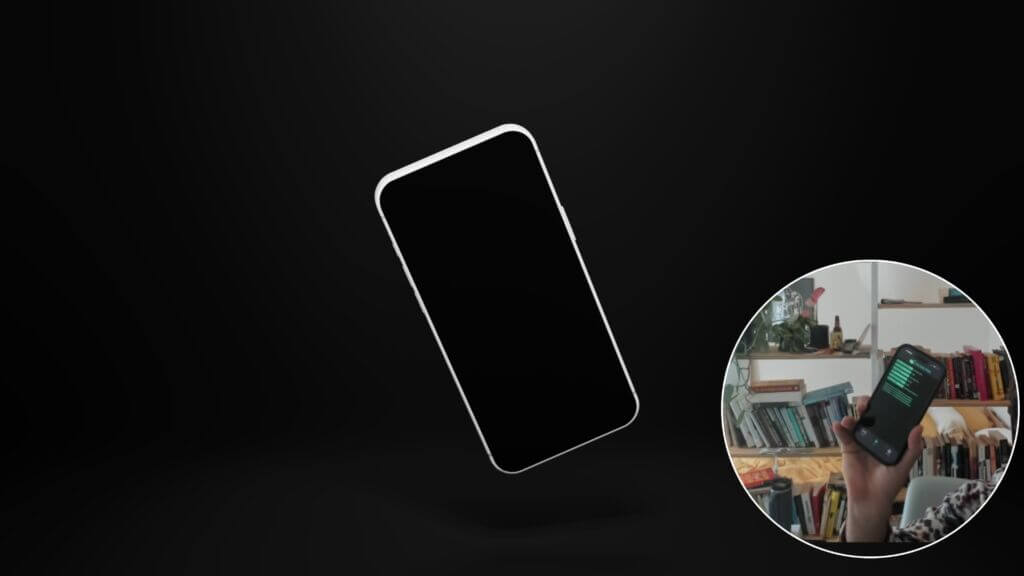
I want to make a digital twin and lucky for you and me, there’s an easy one we all carry around that has good quality models and a built it accelerometer to boot. It’s your iPhone.
If you’re an Android guy, fret not you could do the same thing we’re about to do. Just you’d have to source your own model.
Data
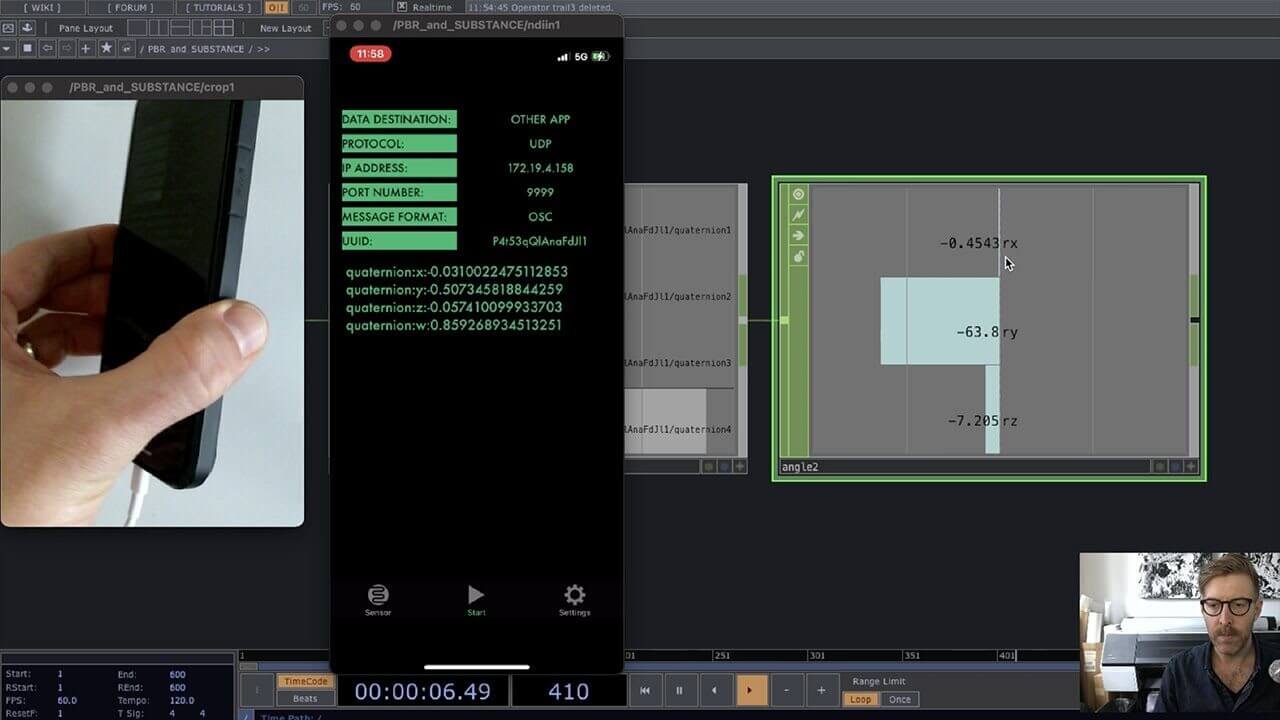
So there’s a nifty app on the iOS store called ZigSim which allows you to use the sensors that allow for native and web AR experiences to work as well as they do. Here’s a link.
There’s a whole lot of things you can have it do from outputting compass data, GPS, face and body tracking, as well as a ton of others. But what we want specifically is the quaternion data.
Quaternions, for those who don’t know, are some very fancy ways for us to rotate 3D objects. You might ask why not more straightforward X, Y, and Z rotations, otherwise known as Euler angles. Well applying real time rotations in Euler means we’re susceptible to gimbal lock where two of the rotation axes align. This makes it so that the object can’t move in one direction and also makes it impossible to smoothly interpolate between one rotation to another.
Instead of just X, Y, and Z, a quaternion includes a W component as well. This is because of complex numbers and some Math fun that is totally out of scope for this post. So don’t lose hope if this is totally new.
When communicating with any sensor, the protocol you use is the secret sauce to making things work. Luckily ZigSim sends OSC messages in the app, it’s all just a matter of supplying the correct IP address of the receiving computer. Once that’s locked and loaded, you’re good to jump to Touch.
If you want a more fine grained explanation of ZigSim and Touch, then Blake Carrington did an excellent overview of setting this up.
TouchDesigner
Now some seasoned Unreal vets out there might be saying that this is a redundancy and something we can handle in Unreal as well as the OSC handling. And this is true but for the sake of this workflow, say a larger part of our application necessitated it. We had some other API that integrated into our app as well. In that case, we’d all be routing them into Touch.
Once the OSC data is passing into Touch, we have to do some light data processing. We want to keep the data in quaternions but there’s a crucial different between the axes of this rotation. Namely, the Y-axis in Touch and with ZigSim is the vertical axis (known as being Y-up). Unreal, unfortunately, is Z-up.
Feel free to read about axis swapping for quaternions if you’re so math inclined, but the simpler approach is just swapping the values for Y and Z as well as flipping the sign on the W component.
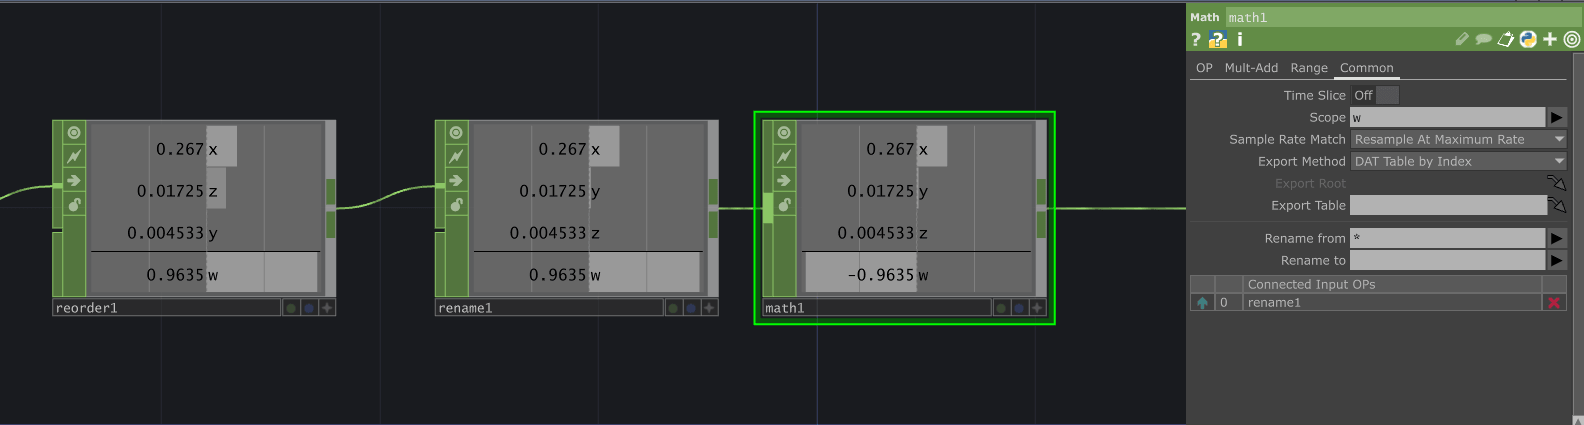
You can do this any number of ways but I just reordered the channels, renamed them back to X, Y, Z, and W, and multiplied the W channel by -1 with a Math CHOP.
Once we’ve processed this, we throw these values into an OSC CHOP using the same IP address for our computer and we’re onto our last step!
Get Our 7 Core TouchDesigner Templates, FREE
We’re making our 7 core project file templates available – for free.
These templates shed light into the most useful and sometimes obtuse features of TouchDesigner.
They’re designed to be immediately applicable for the complete TouchDesigner beginner, while also providing inspiration for the advanced user.
Unreal
When the quaternion information is piped into Touch and we’ve flipped the axis to have Z-up, we’re then able to send over the information for Unreal to consume.
Here’s a great 3D model of an iPhone. I export a gltf model but glb should work fine as well. We can then take this model, drag it into the content browser and then have access to it in our scene.
However, it’s important to put the model wrapped inside of an empty Blueprint for us to also have access to the Unreal OSC blueprints as well as the iPhone for applying the rotations. My structure looks like this:

I wrapped the actual iPhone mesh in another empty mesh to 0 out any other rotations, and origin locations from the import. Then the rotator is what we’ll apply the quaternion data to.
Once we’ve got that going, we can jump into the Event Graph and set up the OSC server. This is very standard and if you need a step by step tutorial, I went over the setup in this video:
Also here’s a copy and paste network you can just drop into the blueprint (link). Once you have that set up it should look something like this:
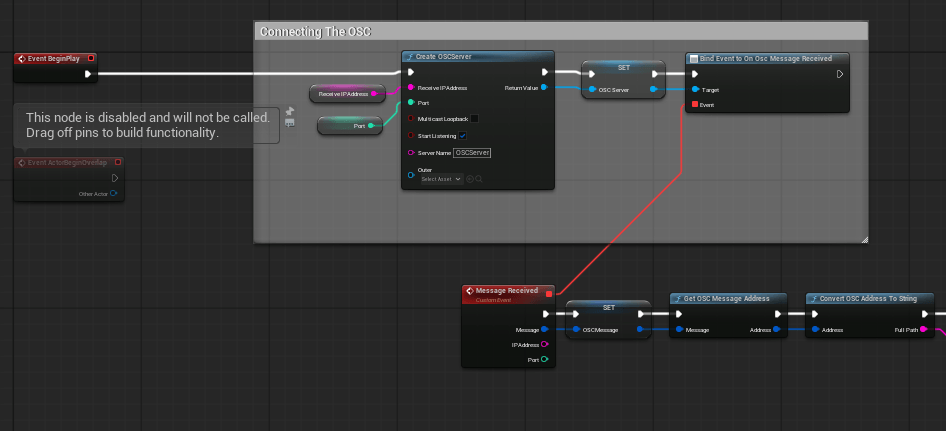
Our next step is seperating out the OSC message from the data passed as an argument in the message. The endings of the address string are X, Y, Z and W and we can split the execution by string condition like so and then add that to a 4 element float array variable in Unreal like so:
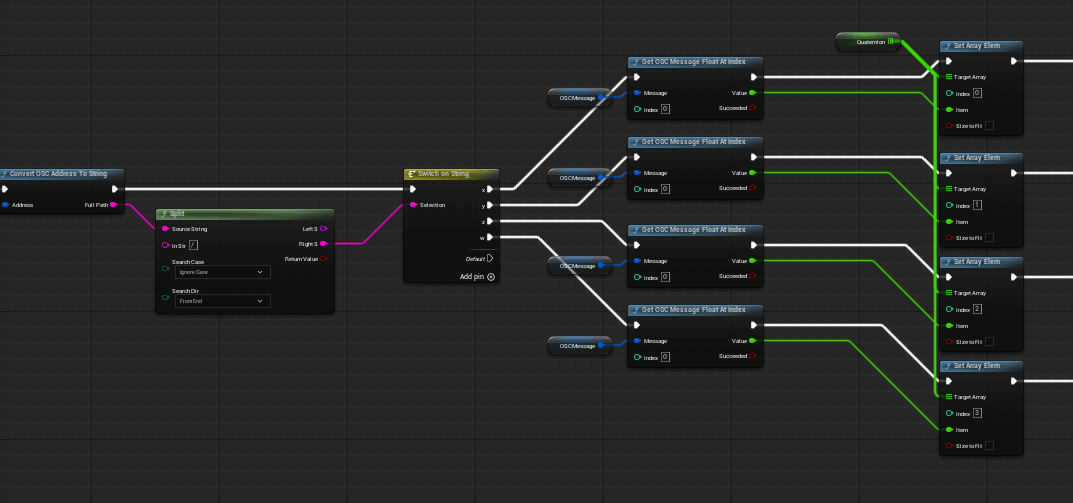
Then once the array index is set for the quaternion array (annoyingly I couldn’t find a 4 element float nor native quaternion data type), X is index 0, Y is 1, and so on. We can then update iPhone mesh inside of our blueprint like so:

If all goes well, you should get something like this, where our phone controls a digital twin in Unreal!

Wrap Up
So in showing this one example, I hope it’s clear how to use Touch and Unreal together. The workflow is one where data and integrations for our application pass through TouchDesigner and then are fed into Unreal. We’ll still have to use some Blueprint functionality in Unreal, but the source of truth for our Application state stays firmly in Touch.
