In this post we explore a workflow that allows us to integrate TouchDesigner and Houdini, by creating complex geometries and custom attributes in Houdini and bringing those geometries and attributes to be modified in real-time in TouchDesigner.
Houdini and TouchDesigner have a close, foundational relationship. TouchDesigner was originally forked from Houdini 4.1 in the early 2000s. Both are node-based, procedural, and share a similar workflow and terminology. This proximity particularly in the context of SOPs, POPs and CHOPs makes working between Houdini and TouchDesigner a very direct experience. While Houdini handles the setup of complex geometries, TouchDesigner takes care of real-time animation and modification of that geometry.
Before we press on, let’s define some core concepts that will help us moving forward:
Attributes: Attributes are named values stored on geometry components (points, vertices, primitives, or the entire geometry) that describe properties or characteristics of that geometry. They exist in both Houdini and TouchDesigner, and with the introduction of POPs it’s even easier to work with them. All Points in Both Houdini and TouchDesigner share an Attribute: P, that stands for position. But there’s other attributes like Normal (N) or Velocity (V) for simulations and particle systems and other user defined attributes.
Groups: Groups are named collections of points or faces, sorted by different criteria. In both TouchDesigner and Houdini it’s possible to use groups to isolate certain parts of the geometry and apply operations to them.
.hclassic and .bhclassic: .hclassic and bhclassic are Houdini 11 ASCCI and binary geometry formats. They store Geometry Data, Point Data, Attributes and Groups. They are natively read in TouchDesigner using the File In SOP and File In POP.
The Integration Pipeline
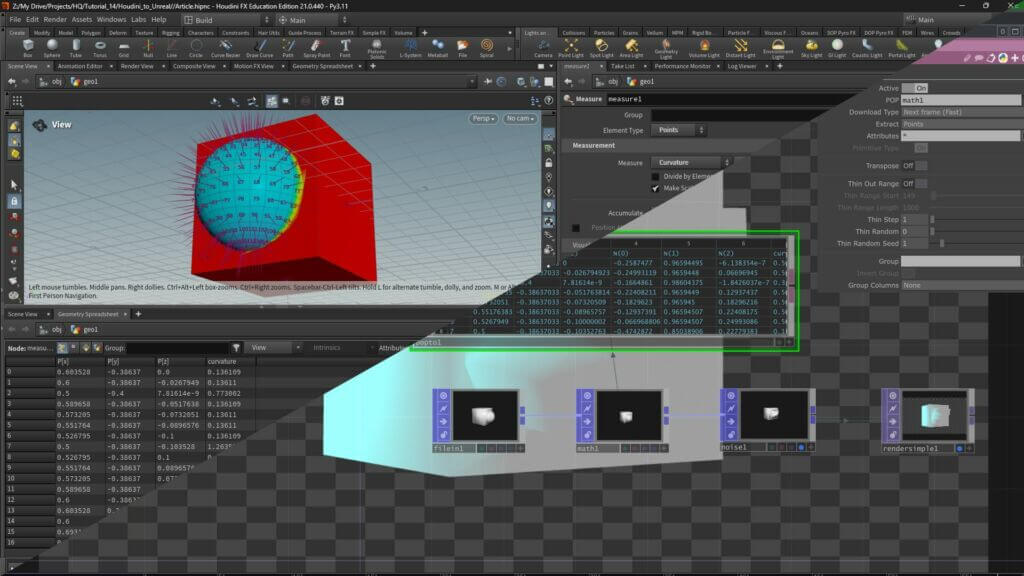
The pipeline we will be using relies on the .bhclassic and .hclassic Houdini files. Because they are native to Houdini and readable in TouchDesigner, they are able to transfer attributes and groups between both softwares. We start by setting up complex geometry in Houdini and creating attributes that we’ll then modify in TouchDesigner. To test this pipeline, let’s pick an attribute that is easy to detect visually but hard to calculate, like Curvature.
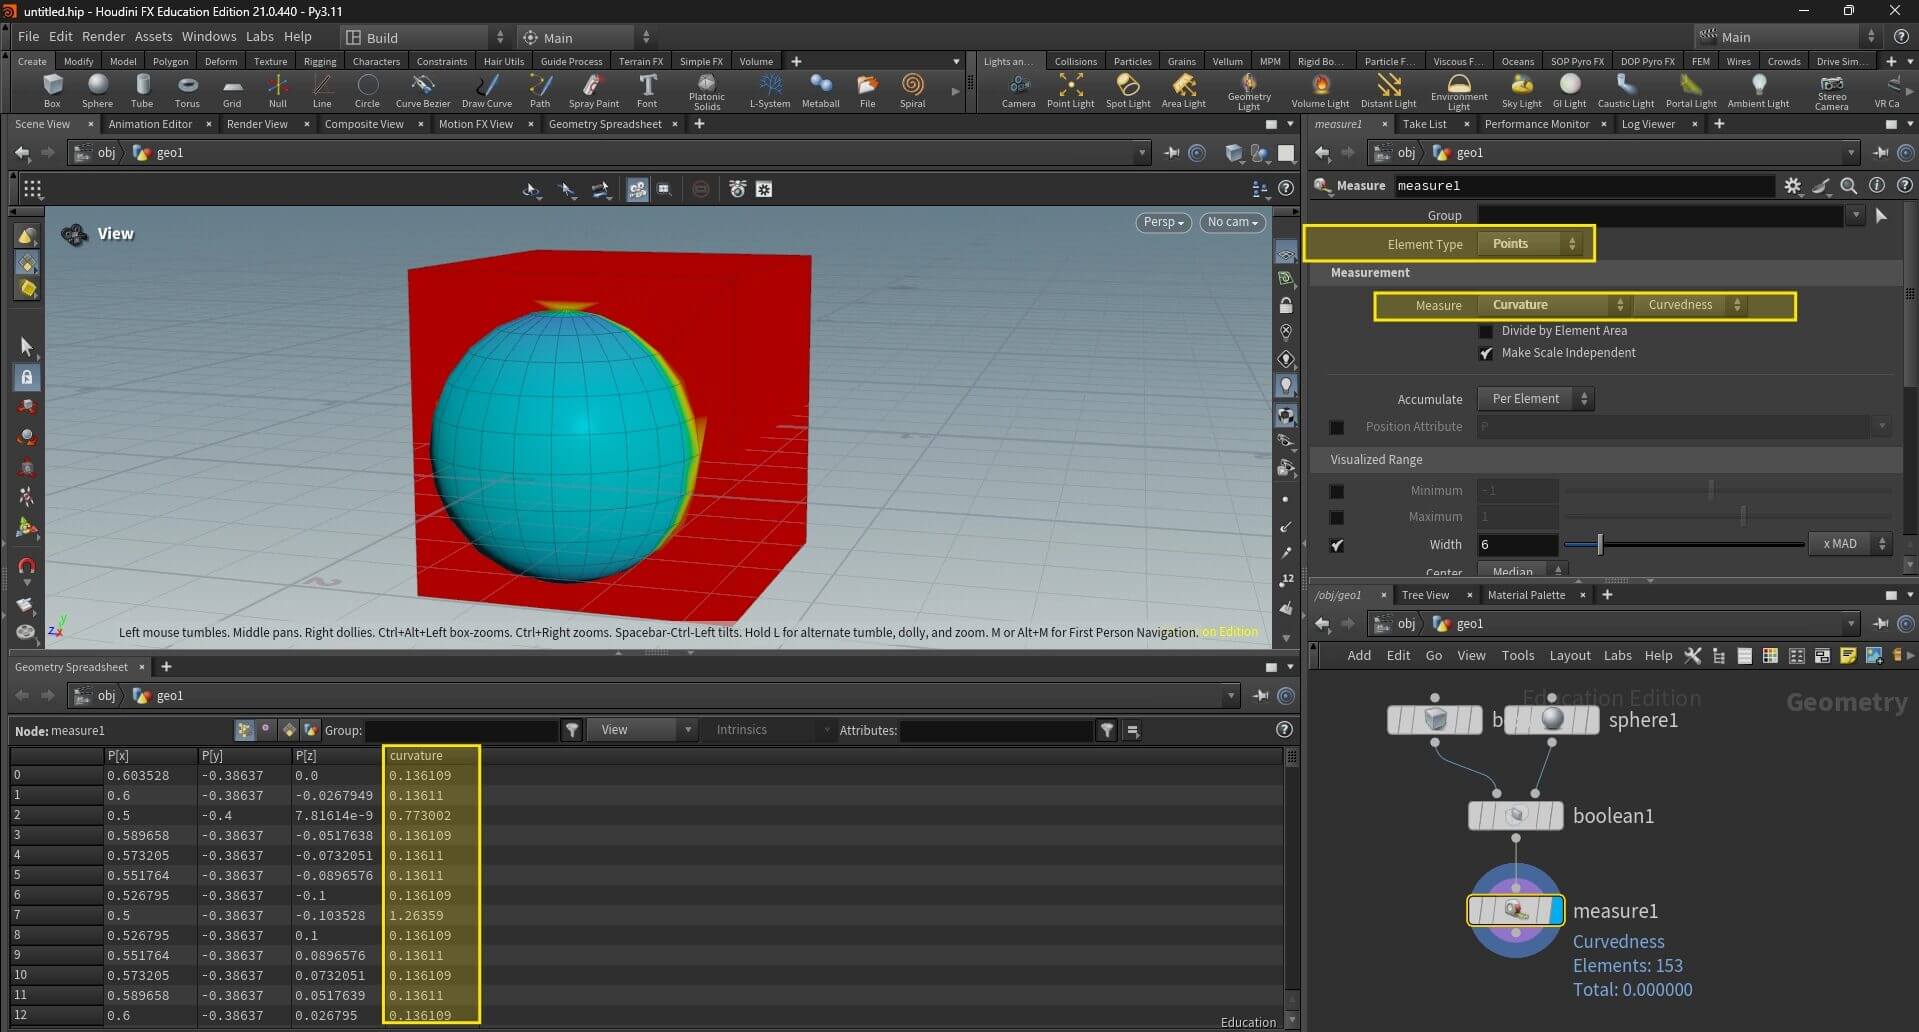
To do that, I am using a boolean node to join a Box and a Sphere. The result is a single piece of Geometry I plug to a Node called Measure SOP. In the Measure SOP I make sure I set the operation to run to the Point level and I chose to Measure Curvature. This Curvature Data is Written down as an attribute that I can later read and manipulate in TouchDesigner.
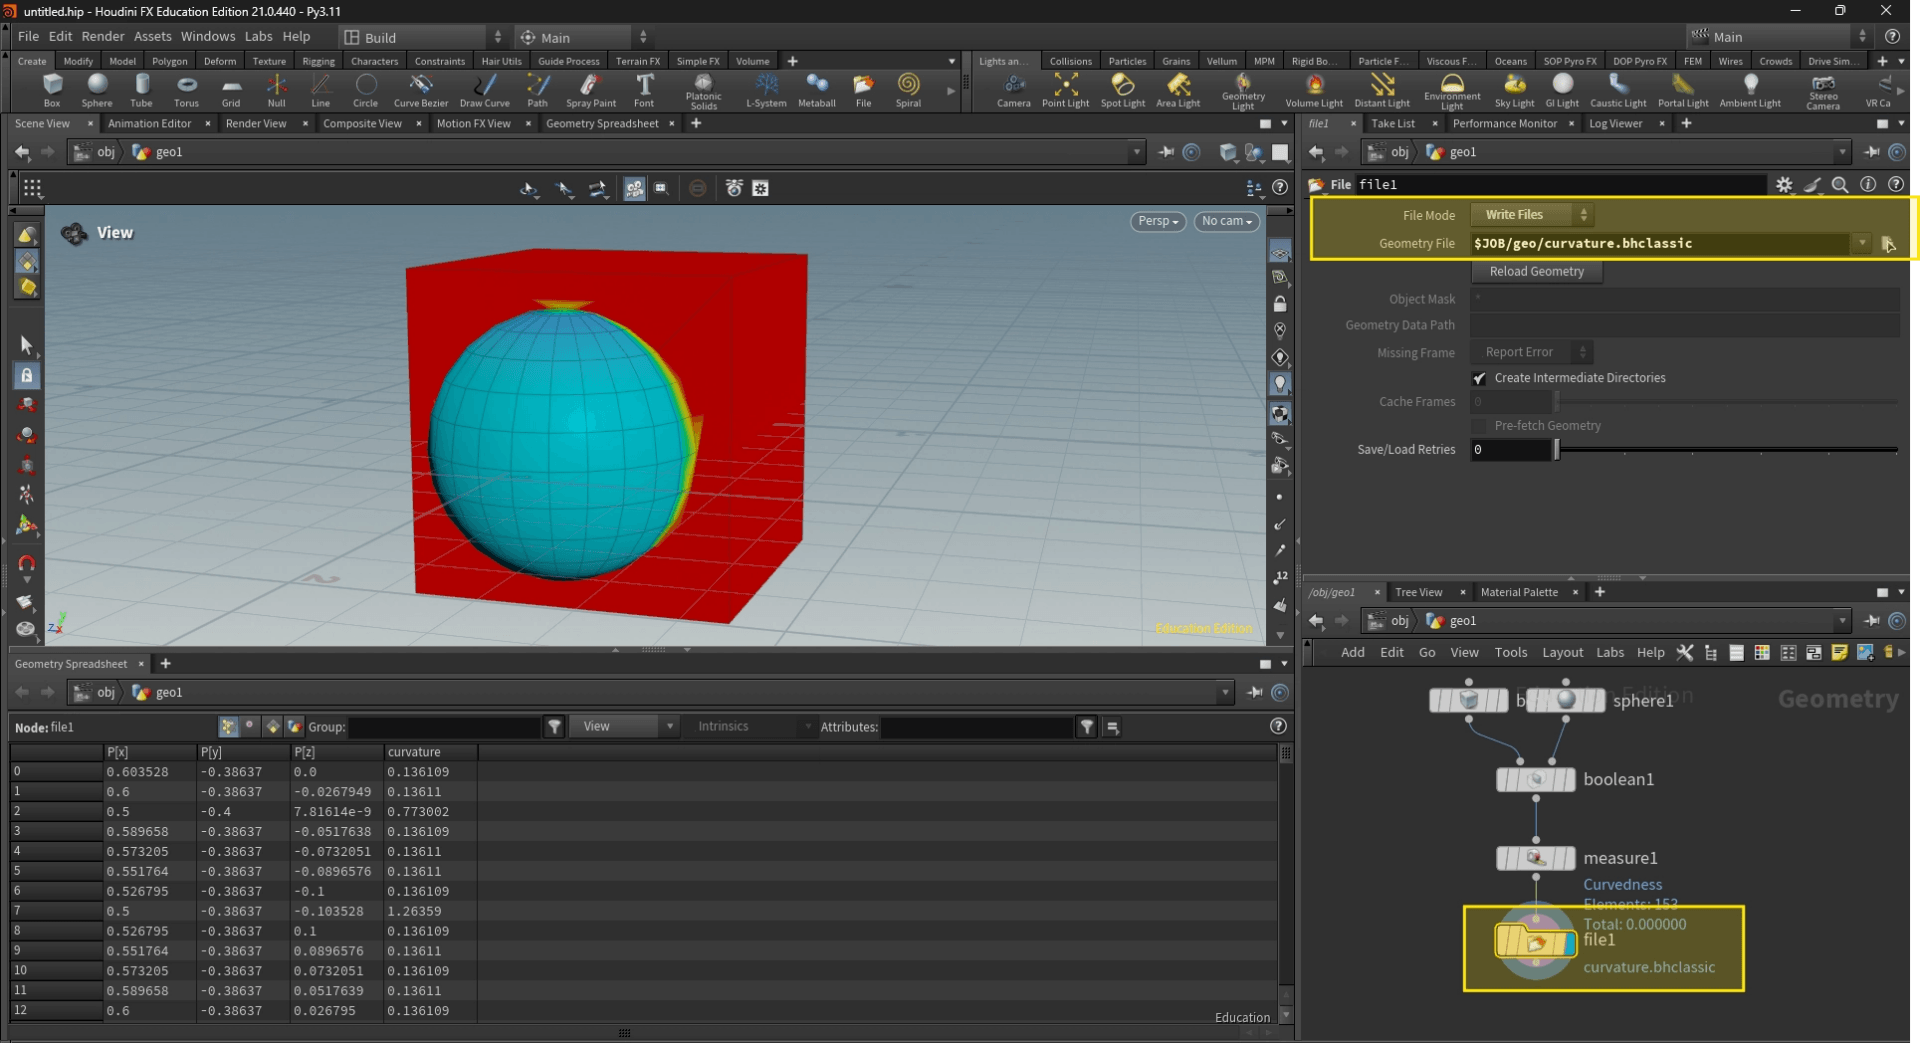
The next step is adding a File Node and exporting my file a as a .hclassic or .bhclassic, so I can import the curvature attributes into TouchDesginer.
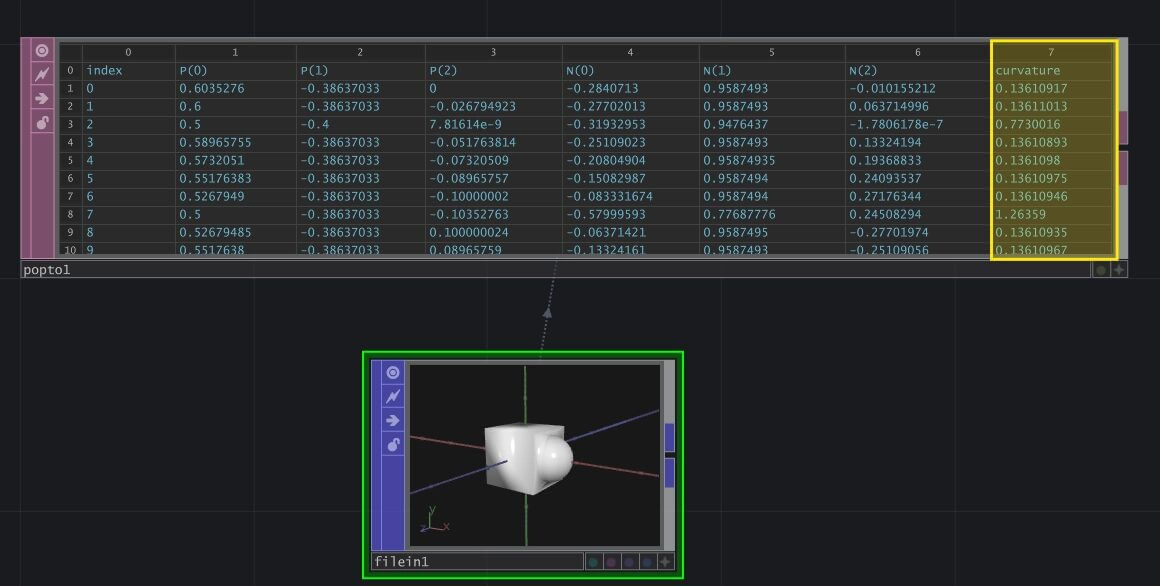
Now in TouchDesigner I can add a File in POP to bring my geometry. If inspect my Geometry with a POP to DAT node I can see my curvature attribute I created in Houdini is readable and ready to be used in TouchDesigner.
Get Our 7 Core TouchDesigner Templates, FREE
We’re making our 7 core project file templates available – for free.
These templates shed light into the most useful and sometimes obtuse features of TouchDesigner.
They’re designed to be immediately applicable for the complete TouchDesigner beginner, while also providing inspiration for the advanced user.
One thing you’ll notice if you are following along is that my curvature value is inverted: The highest curvedness values belong to the flattest faces, that’s because what Houdini Measure Node in Curvature is measuring is the divergence of the normal values between adjacent faces.
The flat adjacent faces of my cube have higher difference between their normals than my curved adjacent sections, and for that reason the values are larger.
If for example, I reduce the number of columns in the sphere, the values of curvature in the Faces of the sphere increases because the difference between adjacent normals becomes larger.
To work around that I add a Math node after my File In TouchDesigner and re-range my values, inverting them. Setting Map from High to the highest number in my spreadsheet.
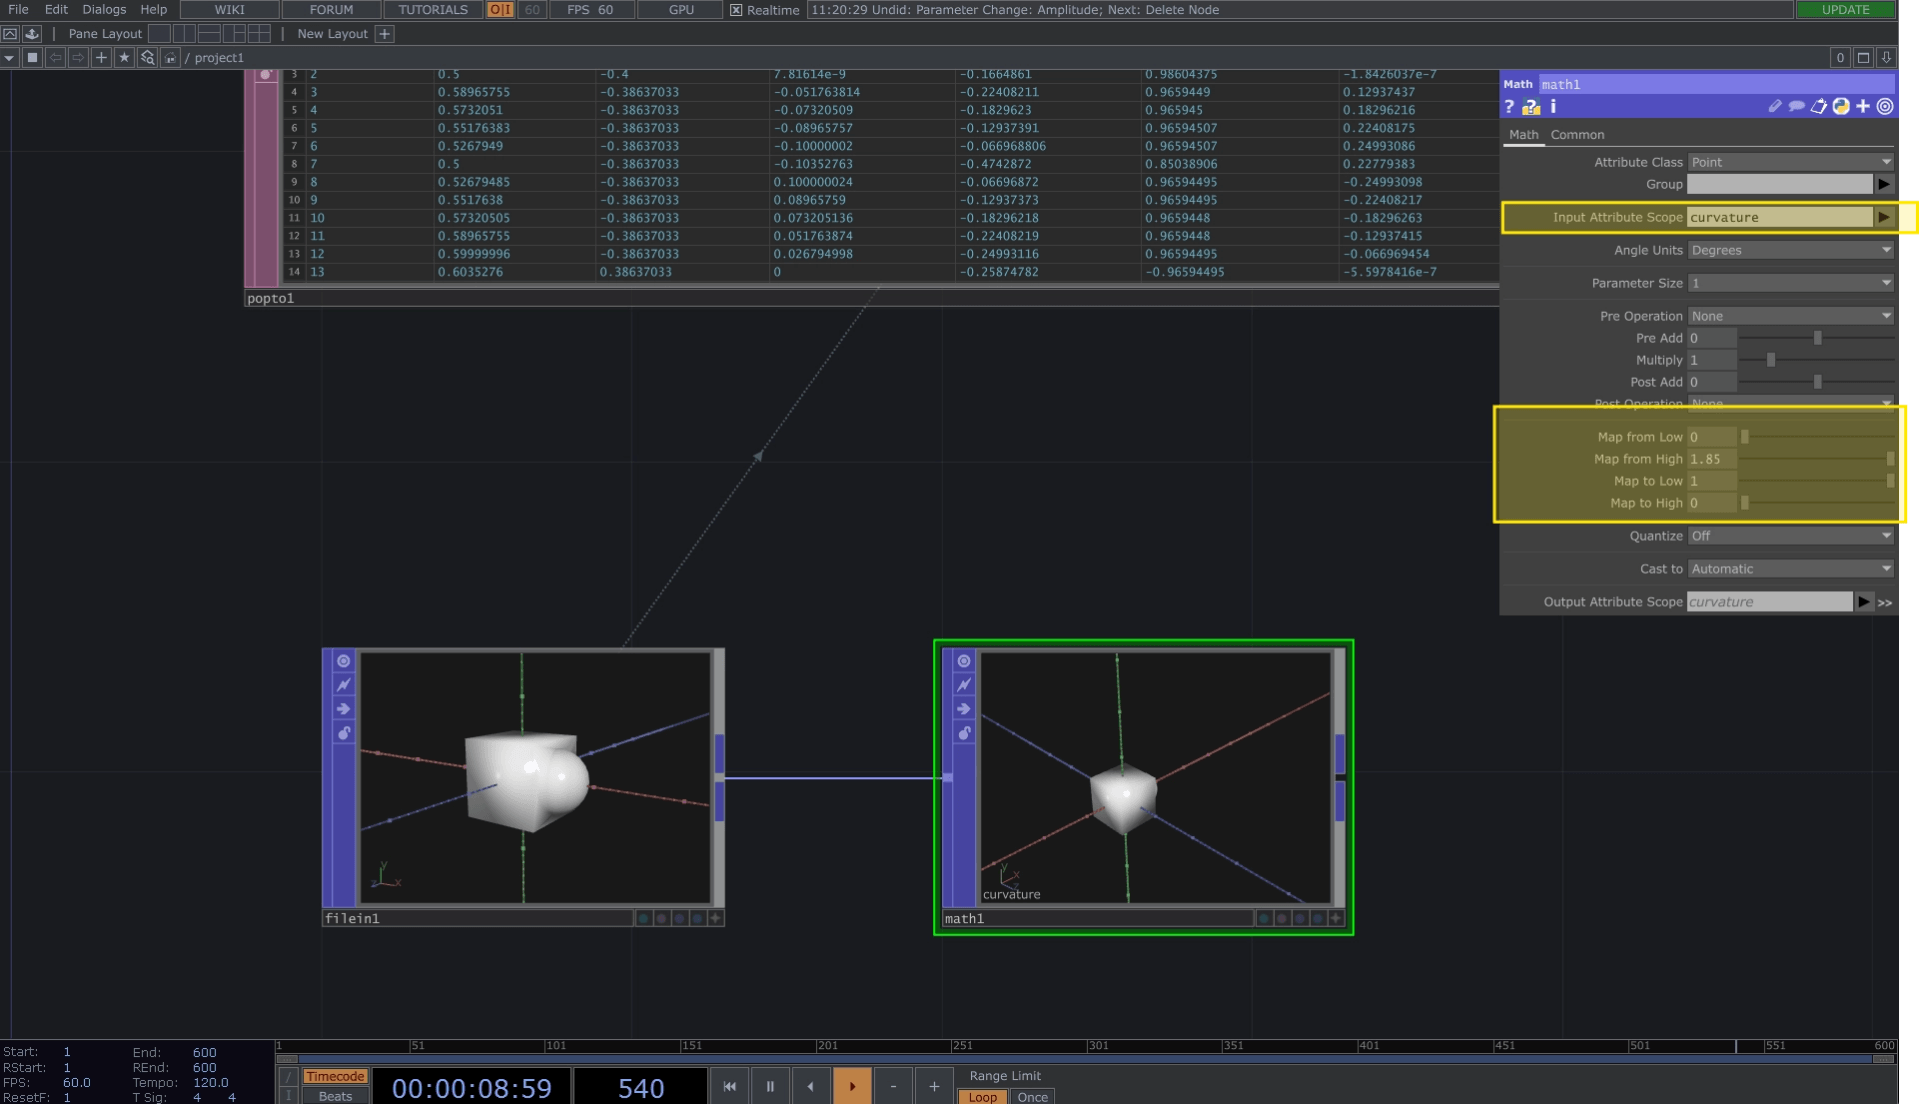
Finally, to complete this quick demonstration, I want to use my curvature value to control where Noise is applied to the position of my geometry. To do this I’ll add a noise and in the map tab, use my curvature value as a multiplier for the noise amplitude, gain and spread. Because the values of the flat faces are so low after my math, they are affected way less by my noise operation.
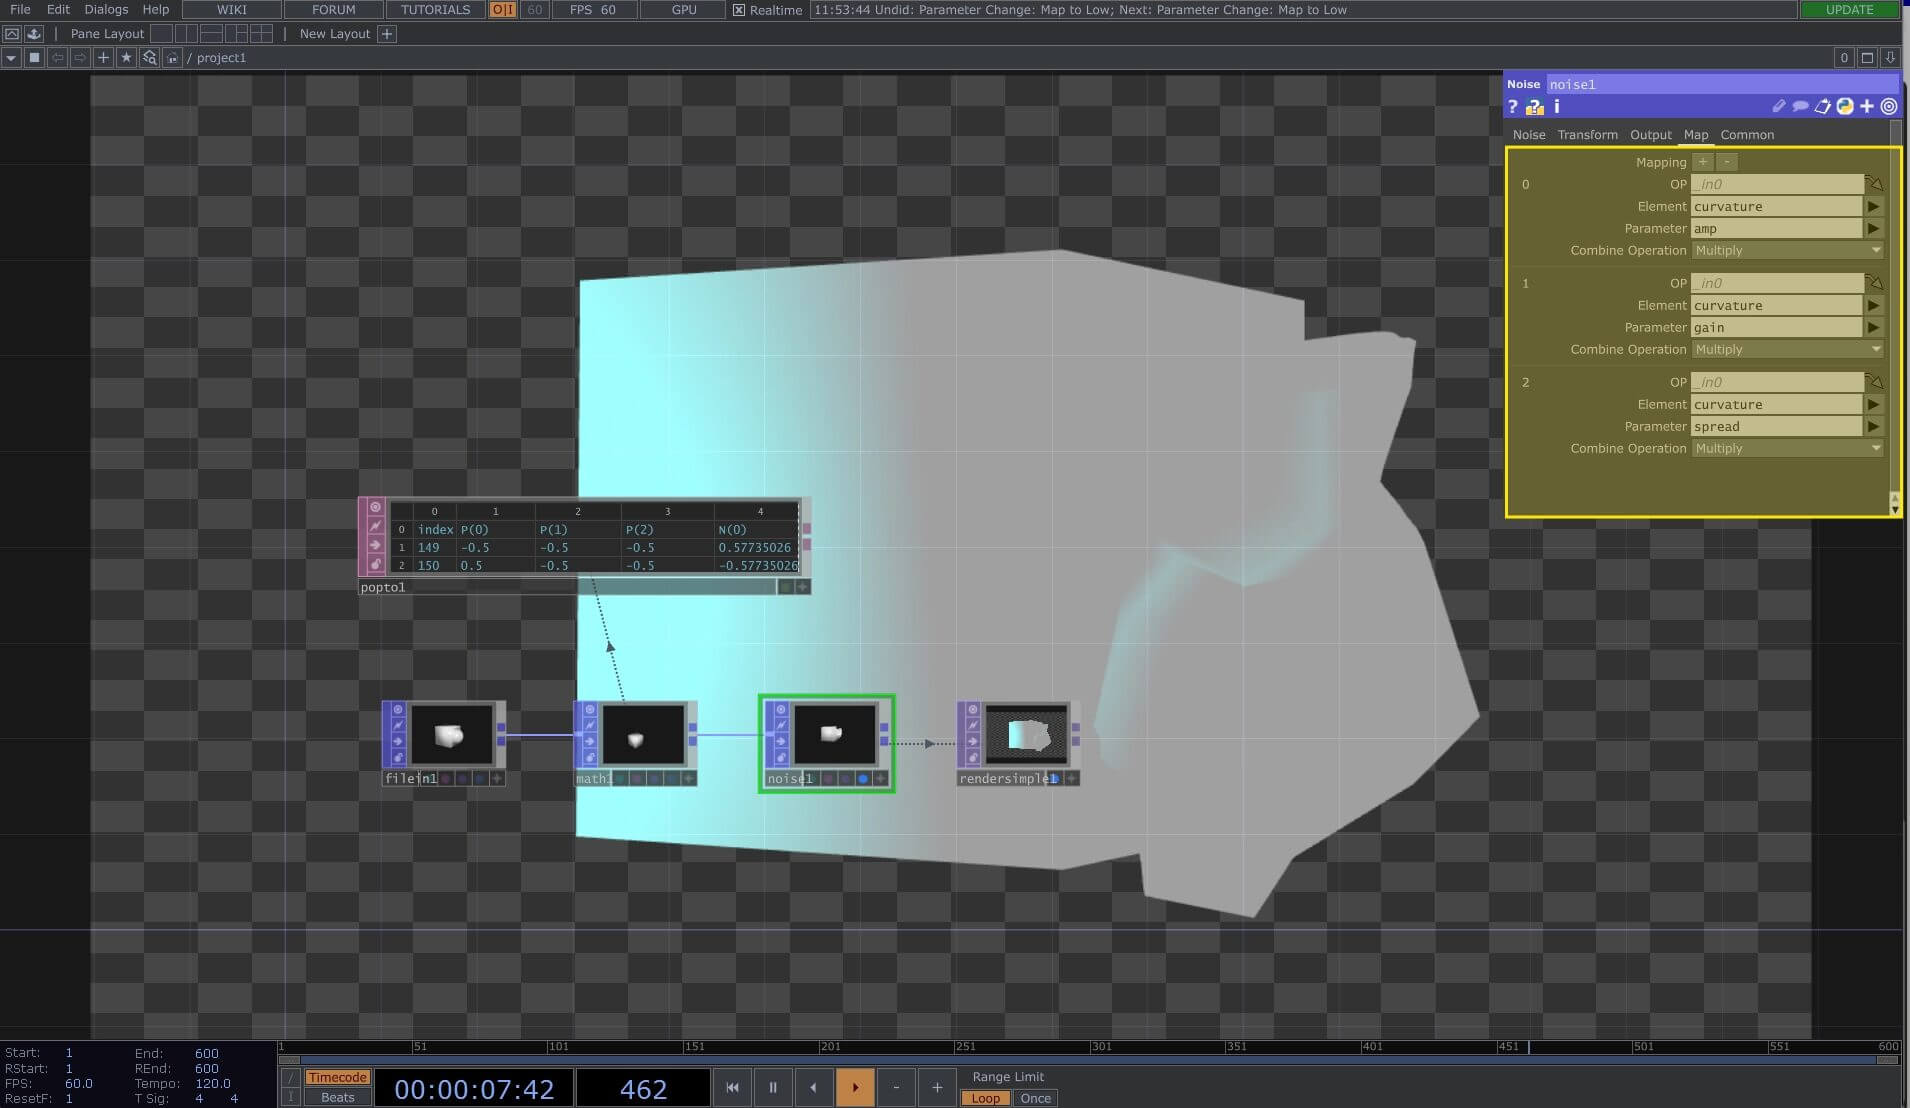
For this example, we used the curvature attribute generated in Houdini and we mapped it to a noise amplitude, spread and gain. Even though this was a very simple operation, is the base of a pipeline that allows us to create complex, hard to calculate attributes in Houdini to later on, using those same attributes to control Geometry in TouchDesigner.
That’s exactly what’s happening the tutorial below. We start by generating a Voronoi fracture in Houdini and then generate a centroid per piece attribute that allows us to control the exploded view in real-time in TouchDesigner:
Wrap Up
The proximity between TouchDesigner and Houdini makes them a great complement to each other. Houdini extends TouchDesigner’s geometry capabilities, allowing the creation of complex systems, while TouchDesigner powers the real-time animation and processing. The possibility of transferring attributes and groups between the two gives TouchDesigner a level of flexibility and control that is not possible with any other type of 3D software. If you work in either tool, it’s worth investing the time to learn both.
