The last post in this series was centered around the content types and gears that can be utilized in your fulldome projects (click here for part 1, and click here for part 2!). In this post of the series, we talk about different characteristics of dome venues and then set the template for our fulldome project in TouchDesigner.
Domes
Dome venues can structurally be different from each other based on their usage. It is important to realize that sometimes these structural differences require adjustments in rendering settings of your project and therefore, to render out the content correctly, you should be aware of specific characteristics of the venue you are making the content for.
One example of a dome with a slightly different structure is SATosphere, Montreal’s fulldome theatre which unlike the usual dome structures with 180 degree vertical field of view, has a 210 vertical FOV, resulting in a larger screen and more options in terms of content design. Below is an example of a 180 degree dome and a 210 degree dome (vertical FOV).


On the other hand, the dome orientation itself should be taken into account and can play a role in terms of content creation. The following video shows the usual orientation of fulldome theaters where its entrance is placed on the “Back” side.


Sometimes fulldome venues might be tilted instead of being flat. This is very common in planetariums in order to give the audience a more comfortable experience and an optimum field of view.

The position of the audience inside the dome environment should also be taken into account for content creators. In fulldome theater usually the audience lies down on the floor facing the “Front” area of the screen. They can be in a standing position as well which can result in a larger population to be able to enter the theatre.
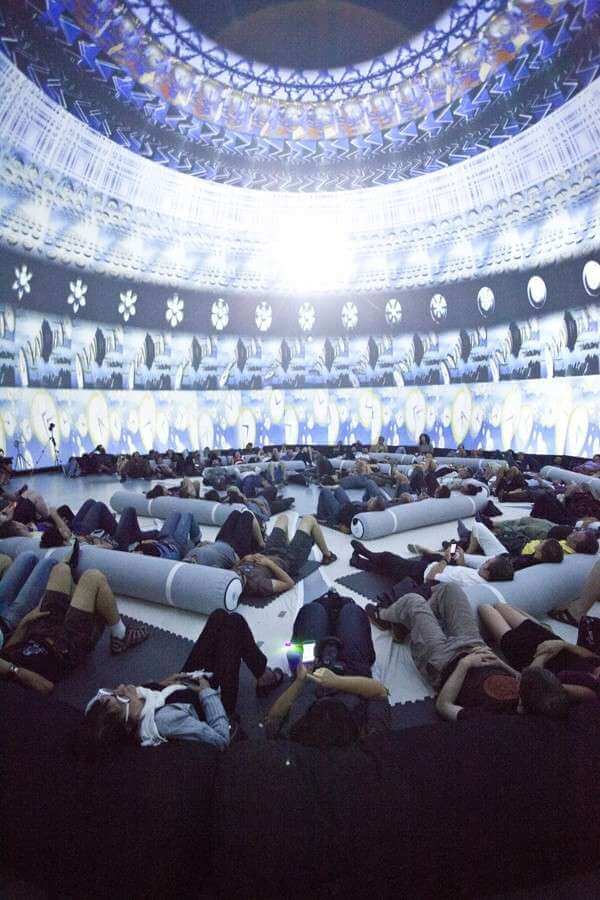
Audience lying down the floor can follow whatever happens in front of them and above their heads
Now, to finish up this section, there is another version of domes in smaller size called “iDome”. Unlike dome theatres and planetarium, iDomes orientation is upright and the audience is facing the center of the screen.

This type is basically designed for more of an individual kind of immersive experience rather than collective, and is used for different purposes ranging from museums’ exhibition rooms to simulators, educational workshops and immersive gaming.
To finish up this section we would like to once more put an emphasis on understanding the physical characteristics of the dome as they can play an important role in your rendering settings and your choice of gear for content creation.
Dome Master
Dome master is the standard format of the content used for fulldome projects. It is being rendered out through a fisheye projection setup in your engine and will be projected on the dome-shaped screen via fulldome theatre projection system. On a 2D screen, the dome master format appears as a circular image placed inside a square. Here are some examples:

https://pineappleware.com/sub/domemaster.html
Content in dome master format designed by the author:


When the dome Master content is projected on the dome, the circular image will cover the whole screen and the space around the image (areas of the square in the background) is where the information about the project and the artist(s) are written on.
Fulldome customization
Although the general format is the same, but fulldome content in some ways differs from regular fisheye footage. To customize the fisheye projection output for the fulldome environment, you should be mindful of the area called the “sweet spot” of fulldome screen, which is the section that is most convenient for the audience to look at and where the main ideas of your content take place.
This sweet spot is the bottom area of the screen, also called “Front”, is where the audience is facing. Therefore, as you import scenes in your project where the center of attention is naturally located in the middle (e.g HDRI), it makes sense to either shift the content down along the vertical axis or rotate your camera (about 45 degrees) such that the center of focus is transformed towards the bottom third of the screen (the lower third of dome master).

We divide the fulldome screen into 2 more sections. The second best part of the screen to project your content is the top center of the dome (zenith).


Content designed by the author for fulldome projects where the center of attention placed on zenith.
The third section is the back of the screen and in contrast with the sweet spot, has the lowest priority in terms of projecting the content since it is located behind the audience.


By comparing the above image you start to see the advantage of the audience lying down on the theatre’s floor, as it makes it more convenient for them to look at the zenith and areas in the middle of the screen, in comparison to the standing position. This also results in more freedom in terms of content creation and more space for the artist to maneuver.
TouchDesigner and Fisheye projection
We start this section by looking at render TOP and the render modes it offers and then start using projection TOP to create our fisheye output. What we need to achieve here is to capture the entire scene (world) and extract half of that captured world through fisheye projection. Among the render modes offered by render TOP, cube map is the one that works perfectly within our workflow, since as said before, cube map is capable of capturing the entire world.

Now we add the projection TOP at the end of our chain after the render TOP, set the input to cubemap and output to fisheye. Here is where the power of Projection TOP comes into play, as it allows you to convert different immersive projection types into one another.

In your projects where you are using only image and movie as inputs and not NOT dealing with geometry and hence the rendering setup, the fisheye output can be achieved by directly connecting your input to projection TOP and adjusting the parameters such as FOV angle and rotations.

Here, since the input is Equirectangular, the Fit Top is used in the middle of the chain to convert the image to a square then feeding it into the projection TOP.
You can even try this method without an actual immersive input but, chances of getting a distorted result will increase, which frankly speaking is not always a demerit, especially if you place it on an immersive background and make sense of them content wise.

So far, this would be sufficient to create the setup for our fulldome project, but later when we practice creating different workflows based on different inputs (geometries, imagery and combination of both), we explore other parameters of the projection TOP like FOV angle and rotation and talk about Camera animation and rendering tips in more details.
Projection TOP
We will finish this episode by recapping the types of immersive projections offered by projection TOP and reviewing their characteristics once more. This will be useful when we continue building on our workflow in the rest of this series. It is also worth mentioning here that for rendering native content, other render modes can also work well in conjunction with the projection TOP.
Most common types of projection used for the input of fulldome content are Equirectangular, Cube Map and Fisheye. You can experiment with them in projection TOP by feeding any content from Movie File In TOP into it.

Equirectangular
Equirectangular (also called Spherical or Panorama 360) captures the entire world .This projection is particularly useful for VR content. The camera is always pointing to the center of the scene, which is the front view. The standard aspect ratio is 2:1. A very familiar example of this type of content is HDRI maps. If you wrap them around a sphere, you can view the entire world in 360 as you turn around in any direction.

Cube Maps
In Cubemaps, 6 faces of the cube capture the entire world, where each face represents a single direction of the camera covering 90 degrees. The directions are front, back, right, left, up and down. When the cube is folded inwards the whole world is captured inside the cube.

Fisheye
Fisheye captures a semi sphere that is ½ of the world. The camera is always pointing at the center of the scene. The standard aspect ratio for Fisheye is 1:1 (square). As shown before, this type of projection is the best fit for creating Fulldome content.

Wrap up
In this episode we covered the differences with regards to different domes’ physical characteristics as they must be taken into account before starting to create content for each type. We also talked about dome orientation and the sections of the screen that should be targeted when designing your content. We initiated our first simple setup for outputting fisheye format and by incorporating projection TOP in our render setup. We then covered different immersive inputs and outputs within the projection TOP.
Now, if you are interested in the physical aspects of dome theatres you can check the link below to see different types of products, from inflatable-mobile domes to projectors and media servers that are available to those who plan to set up their own Fulldome theatres.
Next, we’ll talk about specific tips and explore alternative workflows based on the available inputs for your project (e.g. geometry, imagery or both) that can be utilized to create your pre-rendered and real-time fulldome project in TouchDesigner.